7 Best Marvel Rivals Healers for Ranked in 2026
Marvel Rivals healing statistics reveal the true competitive meta for 2026. Cloak and Dagger currently maintain a massive 56% pick rate since launch, while Storm and Magik control the win rate charts at 56% and 53% victory rates respectively. Luna Snow holds a substantial 20.66% pick rate in competitive matches, and Mantis delivers consistent performance with 56% wins in quickplay.
These numbers prove that Strategist selection directly impacts ranked success in Marvel Rivals. The seven healers featured in this guide represent the strongest options for competitive play, each offering distinct advantages that can swing matches in your favor. From versatile support options to specialized team-up synergies, these rankings cover the most effective healing choices for climbing the ranked ladder in 2026.
Ultron: The Only Flying Healer
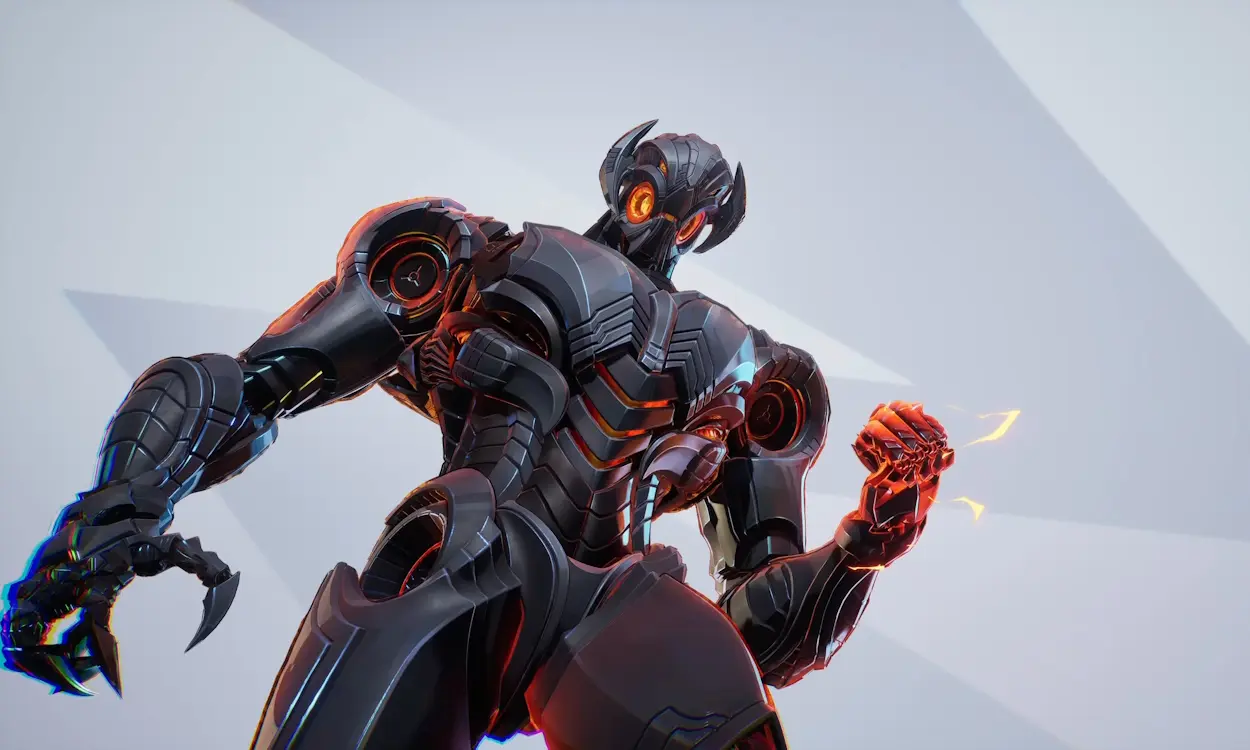
Ultron launched with Season 2.5 on May 30, 2025, introducing the first airborne Strategist to Marvel Rivals. His flight capability creates a unique positioning advantage over traditional healers, but the numbers reveal a different reality. At 1,131 health per second, Ultron delivers the weakest healing output among all Strategists. This makes him function more like a hybrid damage dealer than a dedicated support option.
Ultron's Kit Analysis
Encephalo-Ray serves as your primary weapon system. The hitscan beam fires six shots before requiring a reload, dealing consistent chip damage followed by a focused burst totaling around 150 damage per cycle. With infinite range and minimal damage falloff, you can pressure enemy backlines from completely safe positions.
Imperative: Patch launches a healing drone to any ally without cooldown limitations. The drone provides 45 health per second to its target while healing nearby teammates within an 8-meter radius at 30 health per second. Line of sight and range requirements keep the drone active. Smart targeting matters here - deploy on Vanguards during team fights for maximum area coverage, or attach to diving Duelists who need sustained support during aggressive engagements.
Imperative: Firewall delivers instant bonus health - 75 HP to yourself and 55 HP to allies within 8 meters. The ability extends to teammates near your active healing drone, creating overlapping protection zones. With a 10-second cooldown, timing becomes critical for countering burst damage windows.
Dynamic Flight offers a quick repositioning dash with 40% movement speed boost lasting 8 seconds, plus 50 bonus health. Use this to escape divers like Spider-Man or rotate between cover positions.
Rage of Ultron deploys combat drones that fire Encephalo-Rays for 9 seconds, simultaneously damaging enemies and healing allies. The healing output surpasses Luna Snow's ultimate in terms of healing per tick. During activation, you gain unstoppable status while regenerating 50 health per second. The ultimate charges faster than most support abilities, enabling aggressive usage without waiting for perfect team coordination.
Surviving in the Air
Your 250 health pool creates vulnerability against focused fire. Hela, Hawkeye, Black Widow, and Punisher can delete you quickly from long range. Flying high into open sightlines where these sharpshooters control angles becomes a death sentence.
Stay closer to your team instead of soaring into the stratosphere. Position near unbreakable cover where you can peek safely while supporting teammates. Your infinite range Encephalo-Ray allows enemy pressure without unnecessary exposure.
The current meta severely limits Ultron's potential. Hela and Hawkeye's dominance makes airborne positioning extremely risky, affecting other flying DPS characters as well. Without such powerful hitscan presence, Ultron could easily achieve A-Tier status.
Optimal Team Synergies
The Stark Protocol team-up with Iron Man completely transforms Ultron's capabilities. Nano Ray converts your beam into a continuous piercing attack dealing 70 damage per second while healing at 85 health per second for 8 seconds. Without this team-up, Ultron struggles with slow ultimate generation and lacks burst healing options. The combination creates unlimited aerial crossfire opportunities.
Flying heroes gain enormous value from your drone placement. Storm and Human Torch receive consistent sustain that ground-based healers simply cannot provide. Your mobility perfectly matches their playstyle, making you the ideal Strategist for airborne teammate protection.
Dive compositions synergize perfectly with Ultron's kit. Thor benefits from drone healing during aggressive dives while falling back near teammates for area healing. Magik, Mister Fantastic, Spider-Man, and other brawlers maintain constant healing during extended fights. Captain America and diving Vanguards require heavy healing attention that your drone provides while following their engagements.
Pair your low healing output with high-output Strategists. Rocket Raccoon's strong healing compensates for your damage-focused approach. Luna Snow and Cloak & Dagger provide the burst healing that covers your sustained healing weakness.
Competitive Role Assessment
Ultron works best as a third support in triple-Strategist compositions. Other supports handle emergency burst healing while you contribute damage and steady area healing. As a solo or dual healer, the Iron Man team-up becomes absolutely mandatory for adequate healing output.
Your specialty revolves around anti-dive protection. Flight positioning keeps you beyond the reach of Black Panther and Captain America, who typically terrorize ground-based Strategists. You excel at healing neglected flying DPS characters that other supports struggle to reach.
The learning curve rewards aggressive positioning choices. Use your ultimate liberally to create backline disruption and rapidly heal tanks. Your role combines damage pressure with supportive healing rather than pure sustain, making you viable only in specific team compositions that complement these hybrid strengths.
Gambit: The Ragin Cajun Support
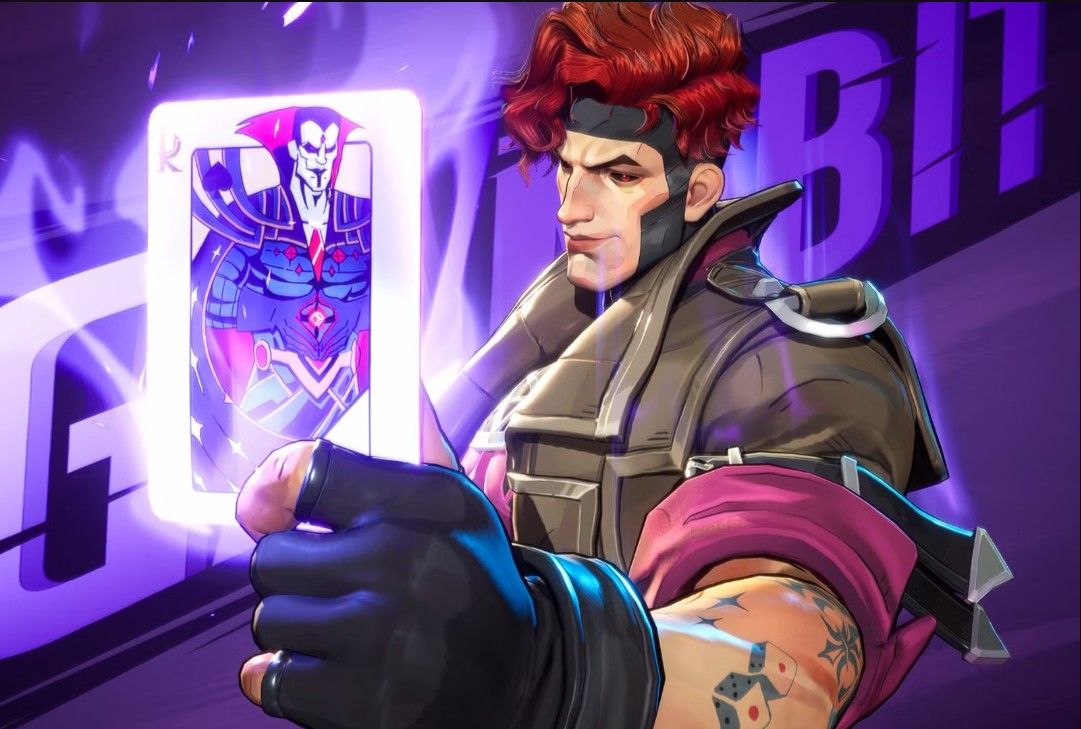
Gambit enters Marvel Rivals as a hyper-flexible Strategist who turns every fight into a calculated gamble of damage, healing, and utility. His kinetic cards let him pivot between burst sustain, debuffs, and lethal pick potential, rewarding players who manage his resources and positioning with near-DPS levels of impact. With one of the most complex support kits in the game, he thrives in coordinated teams that can play around his tempo swings rather than relying on passive sustain.
Gambit’s Support Abilities Breakdown
Kinetic Cards
Gambit flicks a short spread of three charged cards that explode on contact, damaging enemies while healing allies they pass through or detonate near. Landing full spreads at close to mid range massively amplifies both your damage and sustain, making spacing and crossfire angles a core part of his skill expression.
Bayou Bash
Gambit unleashes an explosive burst of kinetic energy in front of him, knocking back enemies and healing allies in the blast radius. With two charges and strong self-heal, Bayou Bash doubles as a peel tool against divers and an emergency sustain option when you’re forced to brawl at close range.
Deck Switch - Hearts & Clubs
Gambit’s kit revolves around swapping between a Hearts deck focused on burst healing/cleanse and a Clubs deck emphasizing crowd control and anti-heal. Mastering when to rotate decks—prepping Hearts for incoming enemy ultimates or swapping to Clubs to finish low targets—separates casual Gambit players from high-level shotcallers.
Hearts Flush (Hearts Active)
Hearts Flush throws a cluster of healing cards that bounce between nearby allies, delivering powerful burst healing and cleansing crowd-control effects on impact. Timed correctly, this lets you negate key enemy ultimates or save multiple teammates from lethal focus fire in a single cast.
Clubs Gambit (Clubs Active)
Clubs Gambit hurls explosive cards that apply an anti-heal debuff and strong chip damage to enemies caught in the blast. Use it to punish enemy frontlines pushing into chokes or to secure picks on fleeing targets who rely on heavy sustain.
Ragin’ Royal Flush (Ultimate)
Gambit marks himself and allies in line of sight with kinetic aces that slam down at their positions, instantly healing, cleansing, and then bathing them in sustained regeneration. While active, affected allies gain increased movement speed, extra jump height, bonus damage on hit, and accelerated ultimate charge, enabling either explosive engages or clutch fight reversals around objectives.
Positioning and Playstyle
Gambit prefers a midline position where he can hit both enemies and allies with his card spreads without exposing himself to direct focus. His low health pool makes overextending fatal, but his mobility and Bayou Bash give him enough tools to kite divers and reposition between cover. Think of him as a battle-tempo caller: he steps forward to convert card volleys into swing plays, then dips back behind tanks once resources are low.
Ragin’ Royal Flush encourages you to play near multiple teammates so more allies benefit from the initial burst and movement buffs. However, hugging your team too tightly can make you vulnerable to enemy AoE, so stagger your angles and use vertical cover when possible. When you’re forced into close-range duels, chaining Bayou Bash with Clubs damage lets you punish overconfident flankers who underestimate his kill pressure.
Resource Management Strategies
Gambit’s card economy functions as his main bottleneck, forcing you to choose when to commit burst healing, control, or damage. Treat Hearts cards as your emergency budget: avoid dumping them on minor chip damage so you always have at least one strong heal-plus-cleanse available when enemy ultimates come online. Clubs cards, on the other hand, can be spent more aggressively to maintain anti-heal uptime on tanks and secure kills during windows where your team has tempo.
Try to weave primary-fire volleys into every safe moment; each successful spread not only sustains your front line but also accelerates your overall value by abusing shared damage and healing angles. In prolonged fights, rotate between decks rather than tunneling on one theme, open with Clubs to soften targets and disrupt positioning, then pivot to Hearts when your team is about to receive the enemy’s counter-engage.
Team Composition Synergies
Gambit shines in lineups that can capitalize on his buffs and debuffs, especially aggressive dive or brawl comps that stay inside his effective range. Pairing him with heavy-disruption tanks or bruisers allows his anti-heal and knockbacks to amplify their crowd control chains, turning clustered fights into kill zones. Dual-Strategist setups work particularly well, letting Gambit flex into more damage- and control-heavy builds while a partner provides stable baseline sustain.
Synergies with heroes who group enemies like magnetic pulls or gravitational fields let Clubs and Bayou Bash hit multiple targets at once, supercharging his value in tight corridors and objective pits. Mobility carries that thrive on burst windows also love Ragin’ Royal Flush, since its movement and damage buffs enable explosive flanks and rapid ultimate cycling during decisive pushes.
Pro Meta Impact and Usage
In coordinated play, Gambit functions as a high-ceiling playmaker who can both initiate and salvage fights through precise deck usage and ultimate timing. His combination of cleanse, burst healing, anti-heal, and real kill threat makes him a priority pick or ban whenever teams are confident in piloting his complex kit. However, that same complexity and low durability can make him feel inconsistent in solo queue, where mismanaged cards or poor positioning quickly turn him into an easy punish.
Mantis: The Tactical Healer
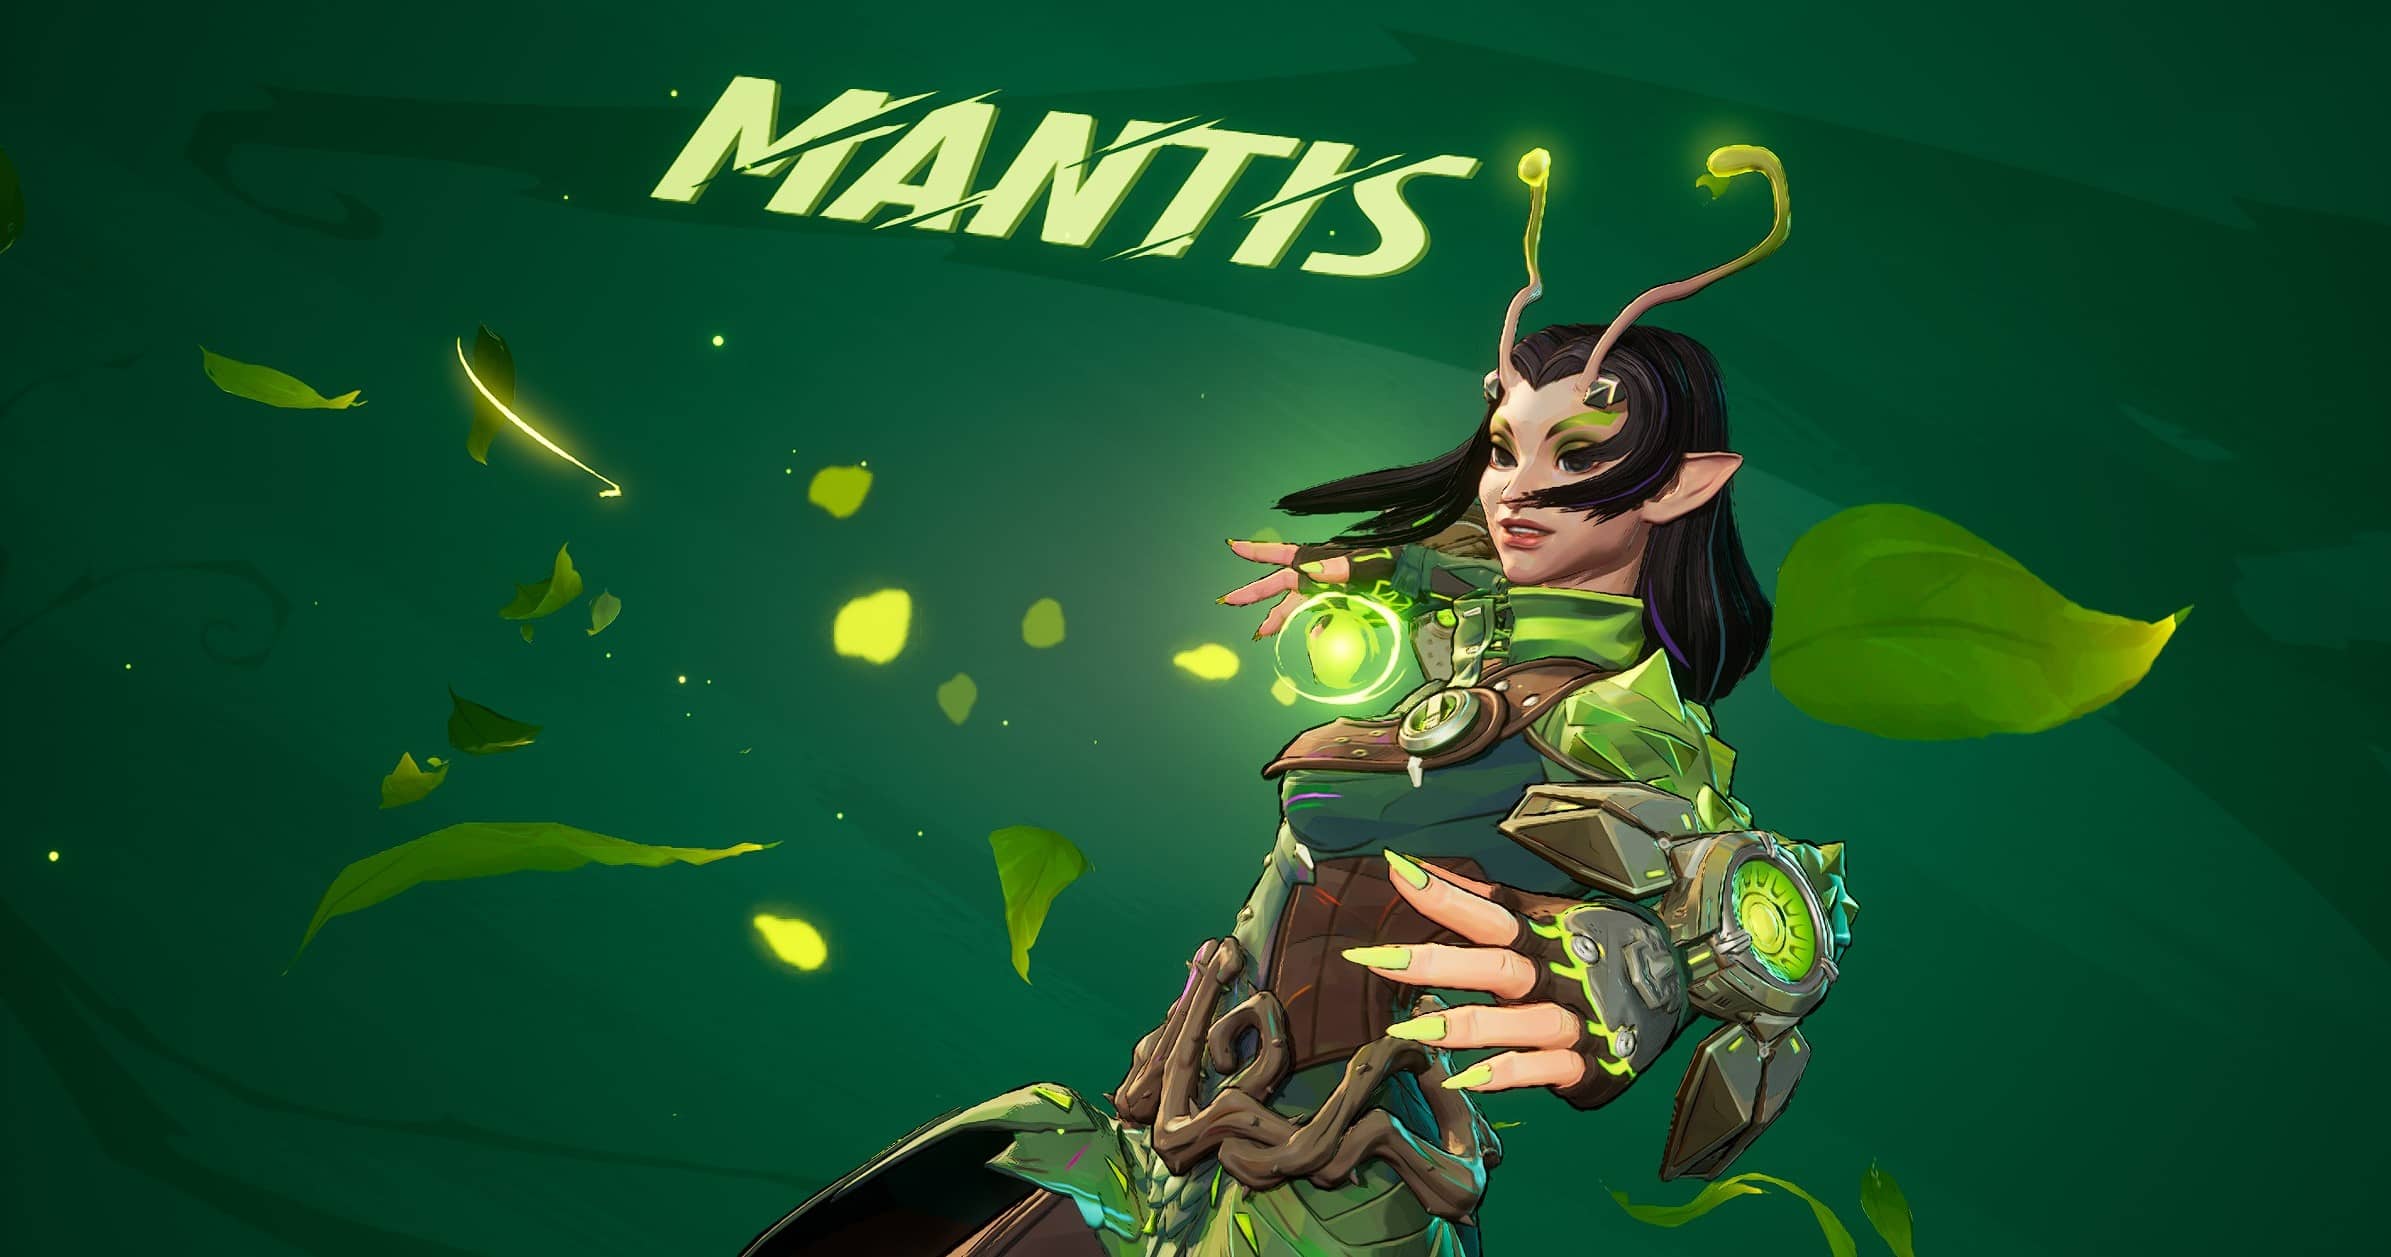
Mantis stands out as the only Strategist in Marvel Rivals capable of distributing damage boosts to teammates. Her empathic abilities blend sustained healing with offensive buffs, creating a unique playstyle that rewards aggressive team coordination. With a 52.7% win rate and 6.09 average KDA, she transforms team fights through precise resource management rather than brute healing numbers.
Mantis's Support Abilities Breakdown
Life Energy Blast fires energy thorns as her primary weapon. Critical hits generate Life Orbs that fuel her entire support kit, making headshot accuracy directly tied to your healing potential.
Healing Flower consumes one Life Orb to deliver 55 instant health plus healing over time at 10 health per second plus 2.5% of the target's maximum health. The effect lasts 8 seconds with a maximum stack duration of 16 seconds. This percentage-based component proves more effective on high-health Vanguards during prolonged engagements.
Soul Resurgence creates an energy field that provides 200 immediate healing plus 150 healing over time to surrounding allies within a 15-meter radius. The ultimate includes a 3m/s movement boost and converts excess healing into bonus health capped at 150. The 8-second duration costs 4300 energy, charging quickly enough for regular usage during objective pushes.
Spore Slumber deploys a spore that sedates enemies caught in its area of effect. The large radius makes this crowd control ability easier to land against high-mobility flankers compared to single-target stuns. Deploy it against diving threats or to interrupt enemy ultimates.
Allied Inspiration and Natural Anger both consume Life Orbs to provide damage boosts. Allied Inspiration buffs teammates while Natural Anger enhances your own damage output, enabling personal eliminations on low-health targets.
Nature's Favor passively increases movement speed to 7.5m/s when uninjured. Consuming Life Orbs triggers healing at 12.5 health per second for 8 seconds, providing self-sustain between engagements.
Resource Management Strategies
Your 4 Life Orbs recharge at 3 seconds per charge, creating the bottleneck that defines Mantis gameplay. Spamming Healing Flower on single targets wastes precious resources. Apply healing preemptively before allies dive into combat to maximize the 8-second duration.
Critical hits remain your priority. Landing 4 headshots on enemy Vanguards quickly refills your orb pool, enabling continuous support cycles. Balance Life Orb expenditure between Allied Inspiration for damage dealers and Healing Flower for frontline sustain.
Target Strategists and Duelists over Vanguards for healing. The 20 health per second baseline provides minimal value on high-health tanks, while Duelists and fellow Strategists gain significant survivability from the same investment.
Natural Anger should be activated frequently when orbs permit. Your supplementary damage output can secure eliminations on enemy supports independently, averaging 12.2 kills per match. This aggressive approach separates effective Mantis players from passive ones.
Pro Meta Impact and Usage
Mantis performs best in coordinated teams where her damage buffs unlock other characters potential. Solo queue players may struggle to experience the same impact without organized communication. Her 1.2% pick rate reflects her specialized role rather than weakness.
Position behind frontlines where you can target allies without exposure. Your 250 health and lack of mobility options make you vulnerable to flankers. Use Spore Slumber specifically against diving threats like Iron Fist or Magik, then eliminate them with buffed headshots.
Soul Resurgence timing matters for countering enemy ultimates or preventing teammate deaths during critical moments. The ultimate charges quickly enough to use liberally rather than saving for perfect situations.
Team Composition Synergies
Phoenix generates an 85.7% win rate when paired with Mantis, followed by Emma Frost at 85.7% and Elsa Bloodstone at 83.3%. Multi-Role plus Strategist compositions achieve 53.8% average win rates.
Adam Warlock provides cocoon revival synergy through the Nature's Soul team-up. Star-Lord benefits enormously from damage buffs, amplifying his offensive output during crucial engagements. Thor thrives with your healing during aggressive engagements, while his Thorforce overhealth stacks effectively with your sustained healing.
Luna Snow creates complementary backline synergy. Both Strategists possess self-healing and strong crowd control abilities, forming a self-sufficient support duo that handles dive pressure independently.
Cloak & Dagger: The Dynamic Duo
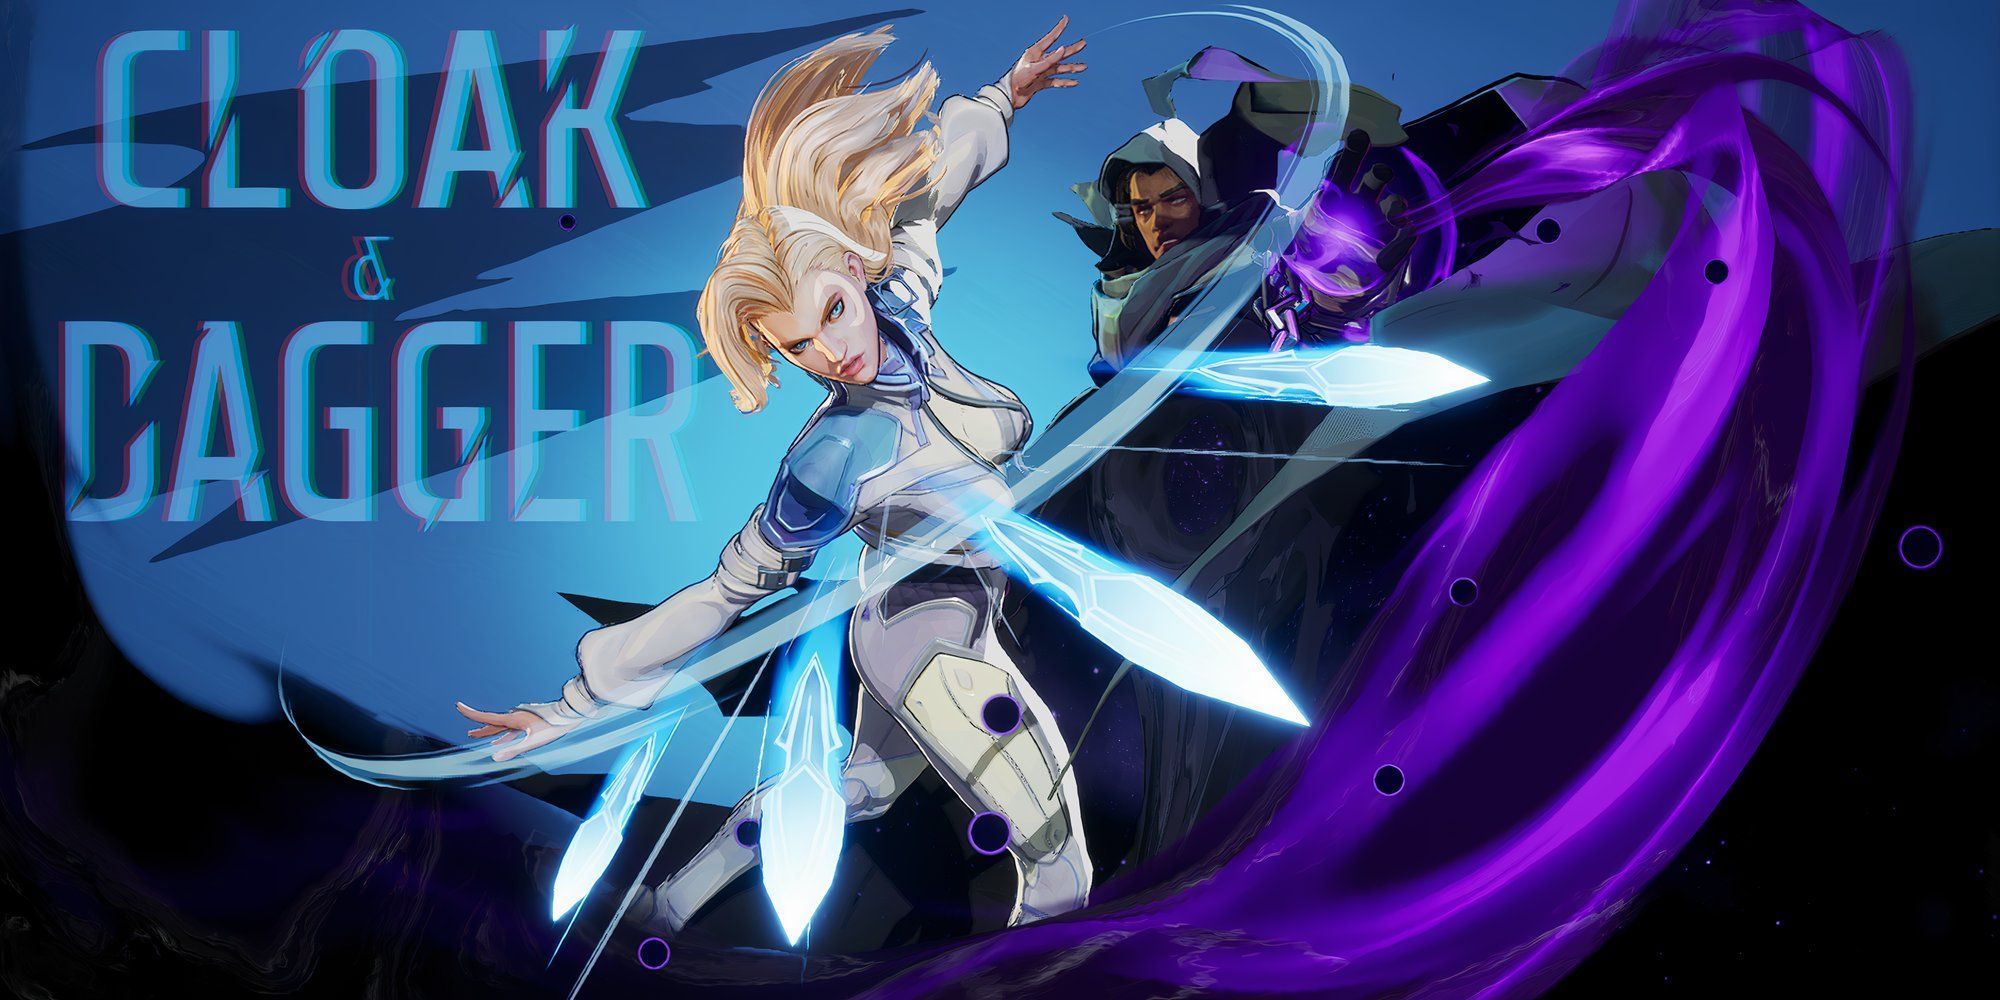
Cloak & Dagger represent one of the most mechanically demanding healers in Marvel Rivals, yet their competitive results justify the learning investment. High-ranked players achieve a 47.31% win rate while outputting 2,805 healing per minute alongside 637 damage per minute. Their dual-form mechanics reward players who master both healing priorities and aggressive positioning, creating a unique hybrid playstyle among Strategists.
Healing and Damage Balance
Dagger's Lightforce Dagger primary fire heals teammates through direct hits while providing area healing via a small aura effect. Dagger Storm creates a healing bubble that restores 55 health per second over 6 seconds, serving as your main self-sustain since basic attacks cannot heal yourself unless teammates position nearby. Veil of Lightforce functions as a moving healing wall, delivering 45 instant health plus a 15% healing amplification buff lasting 4 seconds.
Cloak's Darkforce Cloak operates as a close-range lock-on damage beam similar to Scarlet Witch's primary attack, requiring proximity to enemies. Terror Cape blinds opponents while applying a 20% vulnerability debuff for 3 seconds, effectively amplifying your team's damage output. The critical balance involves avoiding excessive Cloak usage. Your team loses healing capacity during Cloak form, making it essential to reserve this mode for self-defense and backline protection.
High-level statistics show players averaging 7.28 KDA with 12.3 kills, 5.1 deaths, and 24.5 assists per match. This demonstrates their ability to contribute meaningful damage without abandoning support responsibilities.
Form-Switching Strategies
Cloak and Dagger share identical button mappings but maintain independent cooldown timers. This allows advanced combos where you activate Dagger's Veil of Lightforce, immediately switch to Cloak for Terror Cape activation, then return to Dagger without cooldown penalties. This cooldown independence creates powerful burst windows.
Form swapping automatically reloads Dagger's weapon, eliminating reload downtime during combat sequences. Dagger's daggers bounce off surfaces, enabling indirect healing of teammates positioned behind cover through calculated ricochet shots.
Eternal Bond ultimate executes four rapid dashes, leaving energy carpets that heal allies at 250 health per second while damaging enemies at 30 per second. Each carpet persists for 8 seconds, and overlapping multiple dashes on identical surfaces compounds the healing effects. The 4,500 energy cost charges quickly enough for frequent objective pushes.
Tournament Performance Analysis
Team Mutants' player SJP captured a $15,000 prize in North American official Marvel Rivals tournaments primarily through Cloak & Dagger mastery. This tournament success validates their competitive viability despite widespread community misconceptions about their ultimate's healing mechanics, with teammates often avoiding the energy carpets entirely.
Performance data reveals effectiveness declining at Grandmaster ranks and above, dropping to 42% win rates. The complexity stems from managing dual forms without losing focus. Players who overemphasize Cloak's damage potential often neglect healing duties, resulting in lost team fights.
Map-Specific Effectiveness
Hellfire Gala represents their strongest performance map across all game modes. Convoy matches yield 48.94% win rates, while Domination mode achieves 48.98% on Hellfire Gala. Their weakest showing occurs on K'un-Lun during Convergence at 47.26%.
Yggsgard and Museum of Contemplation both maintain approximately 48.70% win rates on Convoy, with Klyntar reaching 48.95% in Domination. These statistics indicate Cloak & Dagger excel on maps featuring grouped team fight zones where their area-of-effect capabilities impact multiple teammates simultaneously.
Adam Warlock: The Cosmic Support
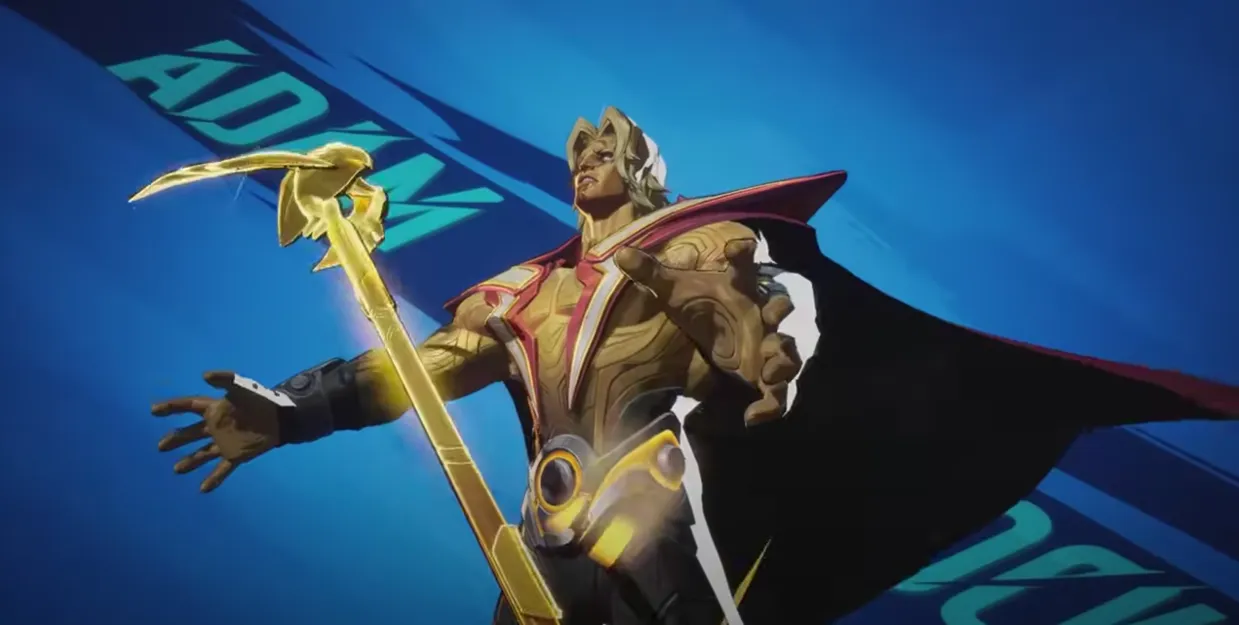
Adam Warlock operates differently from traditional Marvel Rivals healers. Rather than focusing purely on sustain, he functions as an off-healer who contributes substantial damage while delivering burst healing when it matters most. His 56.1% win rate paired with only a 1.4% pick rate positions him among the most underutilized Strategists in competitive play.
Soul Bond Mechanics and Applications
Soul Bond serves as Adam's cornerstone ability, creating connections with allies within 15 meters that distribute incoming damage across all linked teammates while providing healing over time. The healing output ranges between 10-15 health per second with cooldowns spanning 30-40 seconds, making timing crucial for maximum effectiveness.
The damage sharing mechanism caps at 250 maximum shared damage per target during the 6-second duration. When any bonded ally takes lethal damage, the link automatically breaks while leaving that player at 1 health. This death-prevention system directly counters burst ultimates from Iron Man, Scarlet Witch, and Magneto, turning potential team wipes into manageable encounters.
Save Soul Bond for full team engagements due to its lengthy cooldown. Using this ability to heal only yourself plus one teammate wastes your most impactful defensive tool. The ability allows hovering and attacking simultaneously, enabling repositioning to high ground for protection once the bond expires.
Combat Performance Analysis
Adam Warlock thrives in aggressive compositions that prioritize quick, coordinated eliminations. Unlike other Strategists who focus on sustained healing, he delivers damage output comparable to many Duelists while providing healing bursts. Top-ranked players achieve between 936-1,349 damage per 10 minutes alongside 11,000+ healing, showcasing this dual contribution.
Karmic Revival resurrects fallen teammates from protected positions behind cover. The key lies in not waiting for perfect revival opportunities. Bringing back one or two critical players frequently determines fight outcomes. Cast this ultimate preemptively against burst damage from Punisher or Star-Lord ultimates, even with zero or one teammate down.
Luna Snow creates the strongest backline combination with Adam Warlock. Her high healing output covers his burst-focused approach, while his damage addresses her offensive limitations. Season 3.5 strengthened their synergy through Luna's Light and Shadow Karma providing mini-resurrection protection. Combined with Soul Bond, both ultimates, and their team-up ability, this pairing creates nearly invincible teams.
Star-Lord gains direct synergy through their team-up ability, receiving self-revival capabilities that support aggressive positioning. Mantis shares this three-hero team-up connection. Aggressive Vanguards like Venom create backline disruption, allowing Cosmic Cluster hits on distracted enemies. Magik, Iron Fist, and Black Panther capitalize on targets weakened through ranged attacks.
Rank-Dependent Effectiveness
Performance data shows rank-dependent effectiveness that varies significantly across skill levels. Adam Warlock reaches S-tier status at Diamond rank and above, yet drops to B-tier below Diamond. This disparity reflects the coordination requirements and mechanical precision necessary for optimal impact.
Elite players demonstrate his potential ceiling. Top-ranked Adam Warlock specialists maintain win rates between 60-83%, with players like "ˢᵒᵘˡbond" achieving 83.6% wins alongside a 5.31 KDA. One Celestial II player averaged 18 eliminations per 10 minutes while maintaining 11,000 damage and 11,000 healing, posting an 82% win rate across 74 matches.
He functions best in triple-Strategist compositions where other supports handle emergency burst healing while you contribute steady damage. Playing Adam in the backline produces inconsistent results. Position aggressively on high ground within line of sight of your frontline, watching enemy DPS to deny flanking attempts. Heal front-to-back rather than back-to-front, hitting your heal chain on frontline Vanguards and letting it spread backward to backline teammates.
His 3.84 KDA sits below the Strategist average of 7.15, yet this statistic proves misleading. Much of Adam's value doesn't appear on scoreboards, as his impact happens in bursts rather than sustained output. Against flankers, he provides excellent anti-dive capability through dueling potential that eliminates most Duelists independently.
Invisible Woman: The Strategic Healer
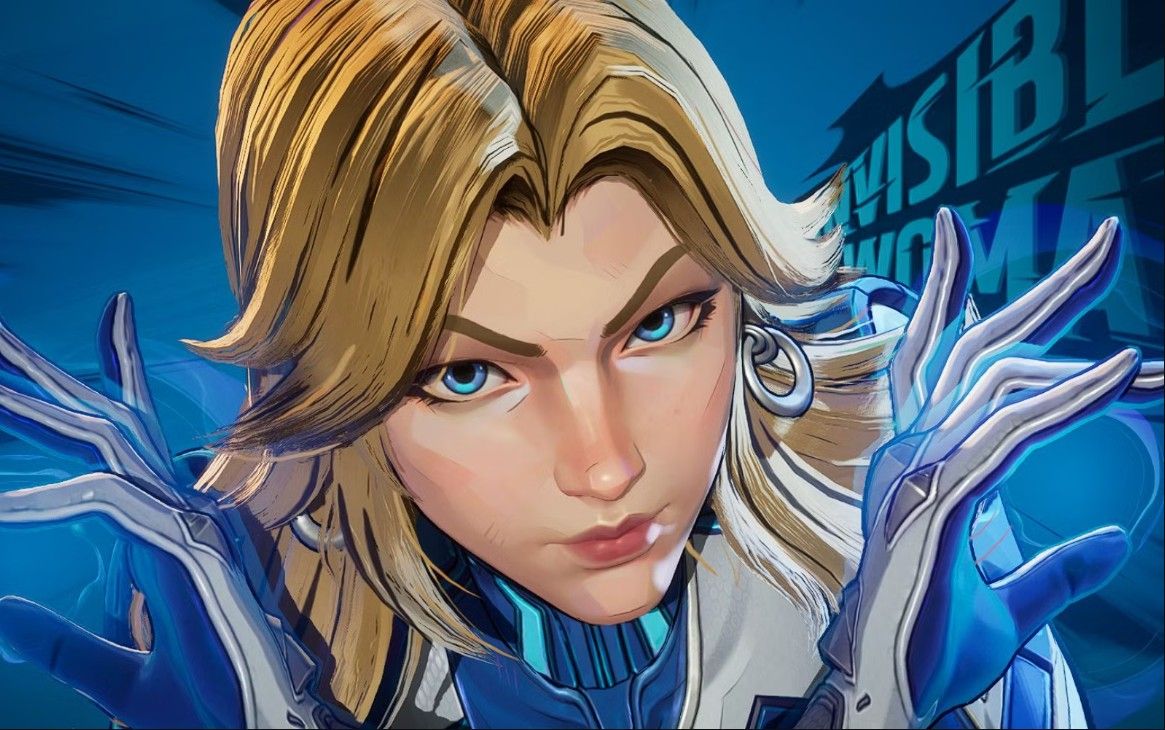
Invisible Woman operates as one of the most versatile Strategists in Marvel Rivals, earning her S+ tier placement in comprehensive tier lists. Her shield-based approach differs significantly from traditional healing methods, combining damage mitigation with consistent area healing. At 300 base health, she stands above most Strategists in survivability, supporting her mid-range positioning requirements effectively.
Shield Deployment Strategies
Guardian Shield creates 250-300 HP energy barriers positioned directly on selected allies. The shield generates area healing at 15-60 health per second within a 5-meter radius, establishing sustained healing zones around key teammates. Enemies moving through the barrier experience 25-30% movement speed reduction, disrupting aggressive dives and flanking attempts.
Shield management becomes crucial for maximizing effectiveness. The cooldown timer starts only after shield destruction or manual recall. Recalling shields before complete destruction restores 50 health per second, enabling immediate redeployment once the barrier regenerates. Active shield repositioning follows team movements rather than static placement, maintaining healing coverage during rotations.
Airborne teammates benefit significantly from shield placement. Flying heroes gain dedicated healing stations that ground-based supports struggle to reach consistently. Standing near your own deployed shield provides self-healing during combat, creating personal sustain without compromising ally protection.
Positioning Requirements
Covert Advance activates after 5.5 seconds without taking damage, granting invisibility plus 20 health per second regeneration. Double jumping triggers immediate stealth activation, serving as primary escape mechanics against diving threats. Optimal positioning places Invisible Woman 15-20 meters behind frontline tanks, close enough for Orb Projection healing while maintaining safe distance for stealth activation.
Her effectiveness drops in dive compositions or spread team formations. Grouped brawl compositions maximize her impact, where area healing and crowd control affect multiple allies simultaneously.
Counter Matchups
Several heroes counter Invisible Woman's kit directly. Punisher's Culling Turret destroys Guardian Shield's 300 HP rapidly. Iron Fist bypasses positioning through K'un-Lun Kick and Crane Leap mobility, while Spider-Man reaches backlines via Web Swing. Daredevil's Radar Sense completely negates invisibility advantages, revealing her ultimate's core benefit. Venom and Doctor Strange apply persistent area pressure, forcing repositioning away from optimal ranges.
Team Synergy Analysis
Pairing statistics reveal powerful combinations. Invisible Woman achieves 100% win rate when teamed with Iron Man, representing a 47.4% improvement over solo performance. Magik partnerships reach 70% wins, while Deadpool combinations achieve 68.1% success rates. Multi-Role plus Strategist compositions average 68.1% win rates, marking her strongest role synergy. Mister Fantastic receives 15% healing boost through Fantastic Four team-up, whereas Luna Snow provides complementary freezing abilities and additional area healing.
Rocket Raccoon: The Tech Support
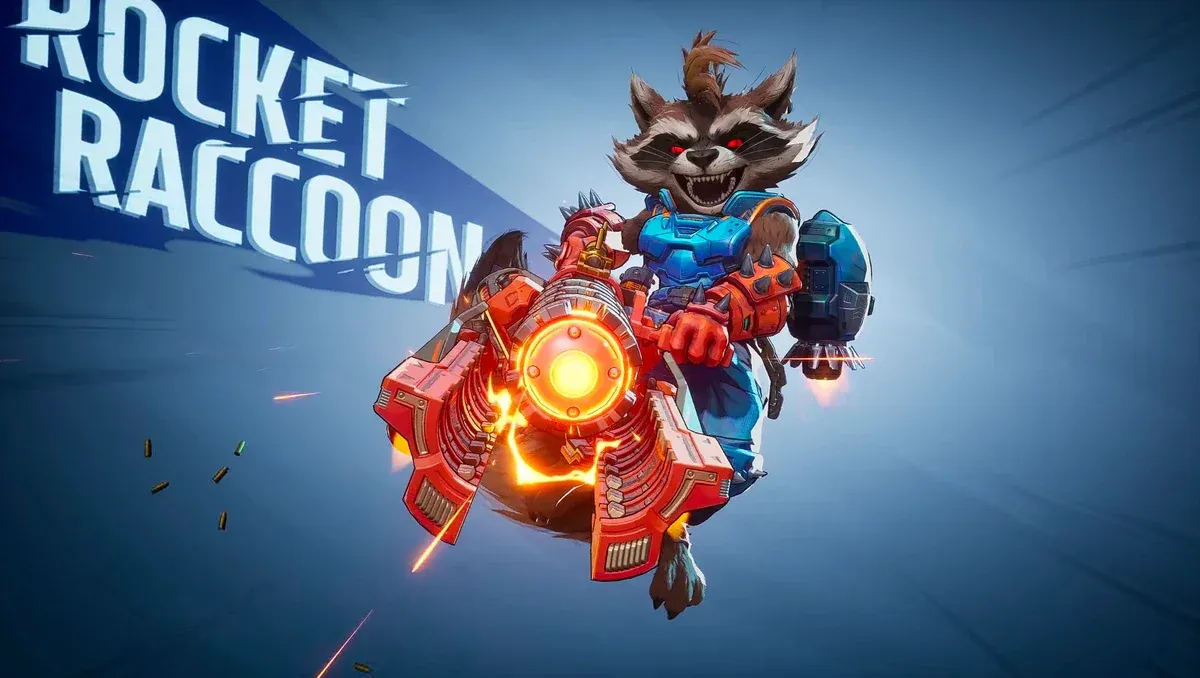
Rocket Raccoon stands out as the most underrated Strategist in Marvel Rivals competitive play. His 55.3% base win rate places him among the strongest healers statistically, yet low pick rates indicate most players fail to recognize his potential. The versatile support kit combines healing, resurrection mechanics, armor distribution, and team-wide damage amplification, making him accessible for newcomers while rewarding advanced positioning techniques.
Kit Breakdown and Mechanics
Repair Mode launches bouncing healing spheres that restore 70 health per second for 2 seconds, totaling approximately 140 health per orb. These projectiles bounce up to 10 times off surfaces, allowing skilled players to bank healing around corners and sustain teammates without direct line of sight. The 5-meter spherical healing radius enables multiple allies to benefit from single well-placed shots, maximizing resource efficiency during grouped engagements.
B.R.B. (Battle Rebirth Beacon) functions as both resurrection tool and utility generator. The beacon resurrects the first fallen ally within 50 meters at full health while continuously producing armor packs that grant 25 bonus health and rocket jetpacks every 3 seconds. With a 300-second duration and 45-second cooldown, the uptime remains exceptional throughout matches. Deploy immediately at match start since the cooldown resets before first team fights begin.
C.Y.A. (Cosmic Yarn Amplifier) delivers 40% damage boost to linked allies plus 100 bonus health per second, capped at 150 total. The 12-second duration creates powerful push windows, though enemy defensive ultimates can counter the aggressive timing directly.
Advanced Positioning Strategies
Jetpack Dash provides two mobility charges for burst repositioning. Combine wall dashes with Wild Crawl wall-running to escape flankers consistently. Flying Ace's 3.5 m/s descent speed allows controlled repositioning during aerial retreats. This mobility toolkit makes Rocket exceptionally difficult to eliminate, enabling perfect KDA performances even during team wipes.
The Peni Parker team-up transforms B.R.B. into a defensive powerhouse through upgraded beacon functionality. Enhanced beacons spawn Arachno-Mines dealing 100 damage and Spider-Drones dealing 40 damage, significantly increasing melee destruction difficulty while providing team alerts for flanking attempts.
Competitive Analysis and Synergies
Statistical analysis reveals Rocket achieves 85.7% win rate with Rogue, 80% with The Thing, and 76.9% with Moon Knight. Multi-Role plus Strategist compositions average 54.5% win rates, suggesting optimal performance in hybrid team structures.
Community analysis identifies Rocket as "sleeper OP" status, with Celestial-ranked specialists often out-healing other Strategists by 10,000-20,000 points per match. His self-sufficiency eliminates peel dependency that affects Luna Snow and Mantis players against skilled flankers, making him particularly valuable in solo queue environments where team coordination remains inconsistent.
Unlike other Strategists who require specific team compositions, Rocket adapts to various playstyles through his multi-faceted kit. The resurrection capability alone can swing close matches, while armor generation provides sustained team benefits throughout extended objective contests.
Healer Performance Comparison
The statistical breakdown reveals clear performance tiers among Marvel Rivals Strategists for ranked play. Ultron and Rocket Raccoon lead win rates at 54.53% and 52.53% respectively, while Invisible Woman commands the highest tier rating despite lacking published win rate data. Invisible Women maintain the strongest pick rate presence at 52.86%, though their effectiveness drops significantly at Grandmaster ranks.
Healer | Healing Output | Win Rate | Pick Rate | Heal/Minute | Key Strength | Best Synergy | Tier Rating |
| Ultron | 1,131 HP/second (lowest among Strategists) | 54.53% | 4.60% | 1665/min | Only flying healer with aerial mobility | Iron Man (Stark Protocol team-up) | B Tier |
| Rocket Raccoon | 70 HP/second for 2 seconds (~140 HP per orb) | 52.53% | 17.40% | 2144/min | Versatile support with resurrection, armor, and damage boost | Peni Parker (team-up), Rogue (85.7% win rate), The Thing (80%) | B Tier |
| Mantis | 55 instant HP + 10 HP/second + 2.5% max health (per Healing Flower) | 52.46% | 5.77% | 1485/min | Only Strategist with damage boost distribution | Phoenix (85.7% win rate), Star-Lord | B Tier |
| Invisible Woman | 15-60 HP/second (Guardian Shield area healing) | 49.93% | 52.86% | 2490/min | Shield-based healing with damage mitigation | Iron Man (100% win rate), Magik (70%), Mister Fantastic | S tier |
| Gambit | Not mentioned | 49.53% | 22.64% | 2250/min | Not mentioned | Not mentioned | A Tier |
| Adam Warlock | 10-15 HP/second (Soul Bond); 11,000+ healing per match | 49.29% | 6.09% | 1365/min | Burst healing with death-prevention mechanics | Luna Snow, Star-Lord, Mantis | C Tier |
| Cloak & Dagger | 2,805 HP/minute; 55 HP/second (Dagger Storm); 250 HP/second (ultimate) | 48.69% | 47.74% | 2811/min | Dual-form healing and damage with independent cooldowns | Not mentioned | A |
Team-up synergies create massive win rate spikes across multiple healers. Invisible Woman with Iron Man reaches 100% win rate, while Rocket Raccoon achieves 85.7% with Rogue. These partnerships often provide more impact than individual healer selection, making team composition coordination essential for ranked success.