The 7 Maps in Valorant's Current Competitive Rotation
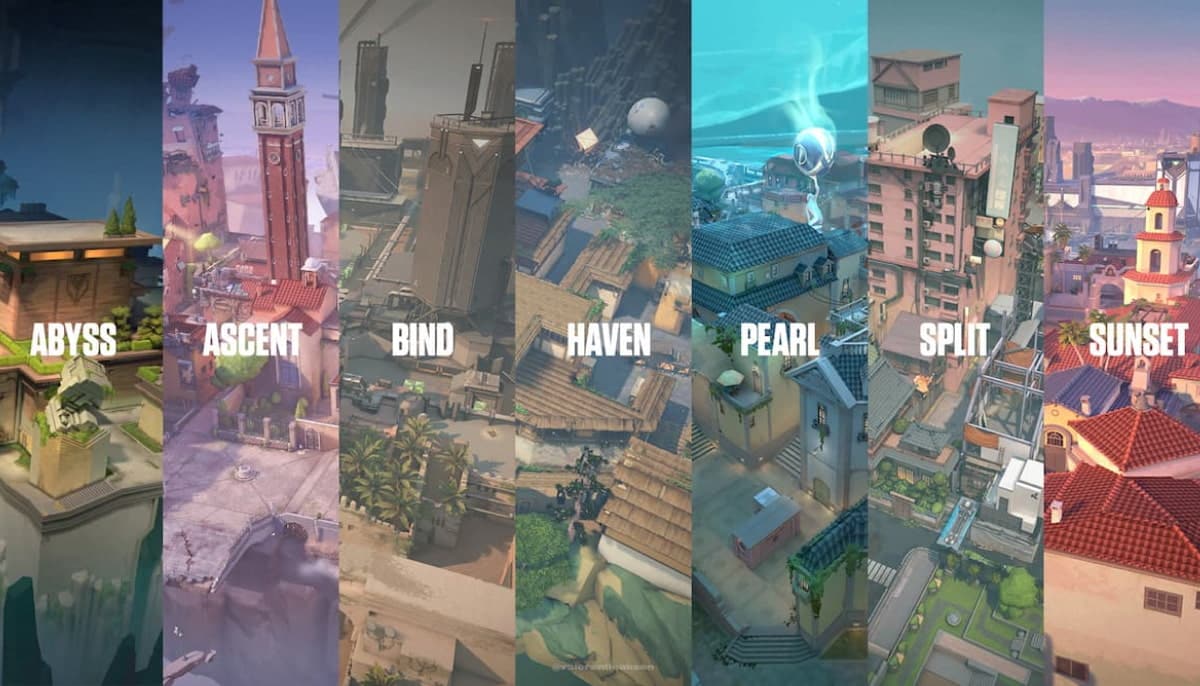
Valorant map rotation continues to shape the tactical shooter's competitive landscape through regular updates that maintain fresh gameplay dynamics. Patch 12.00 in January 6th 2026 established the current competitive and ranked map pool at seven distinct battlegrounds: Abyss, Bind, Breeze, Corrode, Haven, Pearl, and Split.
Breeze returned to competitive play on January 6, 2026, pushing Sunset out of the active rotation. This change reflects Riot Games' consistent approach to maintaining exactly seven maps in the competitive pool at all times, a philosophy confirmed by Valorant's Lead Map Designer, Joe Lansford. The game employs a deterministic map system that prioritizes variety and minimizes consecutive matches on identical maps.
These seven maps appear across both competitive and casual game modes, while five others remain inactive. Ascent, Fracture, Icebox, Lotus, and Sunset currently sit outside official matchmaking queues. Riot maintains distinct map pools for different game modes, with Competitive and Premier sharing one set while Unrated and Spike Rush operate under separate parameters.
Abyss
Located beneath the arctic island of Jan Mayen, Norway, Abyss stands as the eleventh map to enter the competitive pool, introducing death-defying mechanics that completely reshape traditional Valorant gameplay.
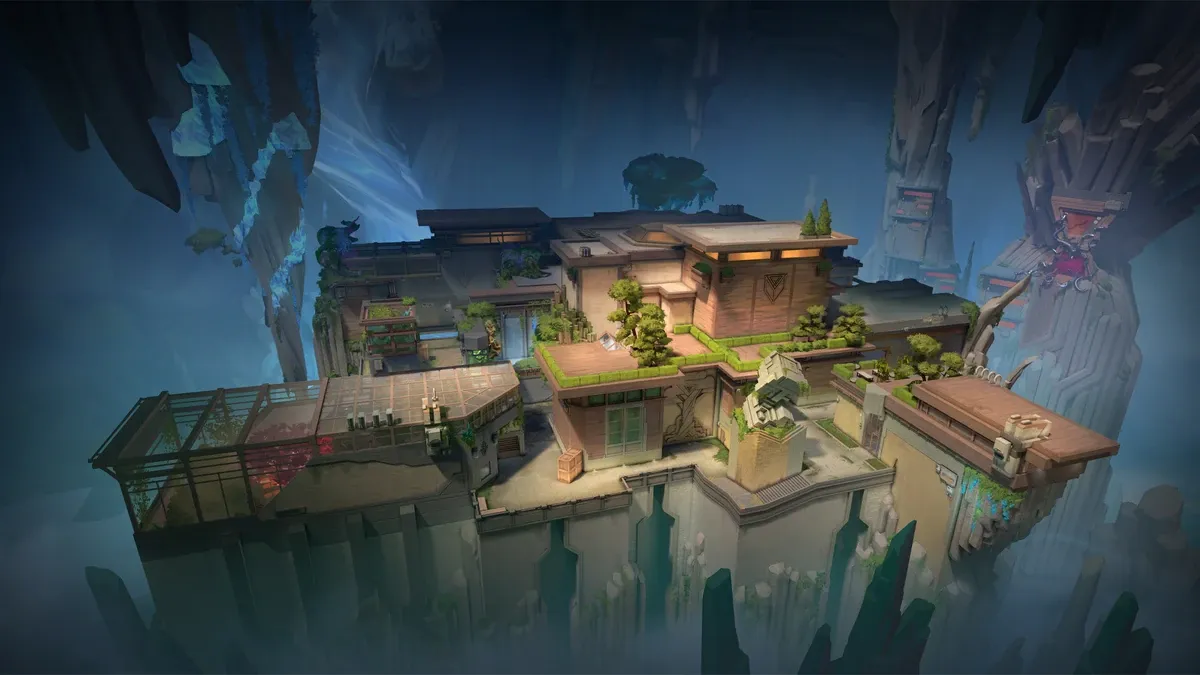
Abyss map overview
Abyss brings players deep into the mysterious Elder Grotto, a hidden fortress previously controlled by the Scions of Hourglass organization before the VALORANT Protocol seized control. The map follows standard three-lane architecture with two bomb sites connected through narrow mid pathways. Three distinct sectors define the underground facility: The Radiant Lock-Up at A site, The Library and Archive, and The Botanical Garden. A site showcases multi-level prison cells where radiant individuals were formerly held captive, their containment units still visible across the chasm behind red-lit glass panels. Simple blocky structures contrast sharply with lush green vegetation throughout the facility.
Abyss unique features
Abyss completely revolutionizes map design as the only battleground in Valorant featuring no outer boundaries whatsoever, allowing players to plummet to their death in specific areas. This groundbreaking approach creates high-risk shortcut routes called "Danger" and "Secret" positions narrow ledges demanding precise jump timing to successfully traverse. The map's death drop mechanics proved immediately popular, recording a staggering 142,812,335 death falls during VALORANT 2024 Flashback alone.
Four ascenders provide vertical movement across the map: A Site to A Tower, B Main to Mid Bend, one in Attacker Spawn, plus the critical mid ascender requiring players to jump over the central chasm. Both Vent area entrances feature destructible doors with 120 HP, displaying the standard color progression from blue to yellow to red as damage accumulates.
Abyss strategic tips
Mid control remains absolutely crucial on Abyss due to the rotation opportunities it provides. Positioning an Operator in mid zones offers significant advantages given the tunnel-like sightlines through library and catwalk areas.
Optimal strategies include:
- Agent prioritization: Mobility agents like Jett, Omen, and Raze excel at navigating death drops safely while creating unexpected angle advantages
- Death drop mastery: Perfect crouch-jump timing enables silent, rapid rotations through dangerous areas
- Utility coordination: Flash and stun abilities become essential before taking peeks, particularly when countering Operators holding extended sightlines
Information-gathering agents prove exceptionally valuable across Abyss's complex layout, with Sova and Fade collecting crucial intelligence while Breach dominates the tight corner control game.
Bind
Located in Morocco, Bind remains one of the original battlegrounds since Valorant's Closed Beta. This map breaks traditional tactical shooter conventions by completely eliminating the mid section, creating a strategic environment that stands apart from every other map in the current rotation.
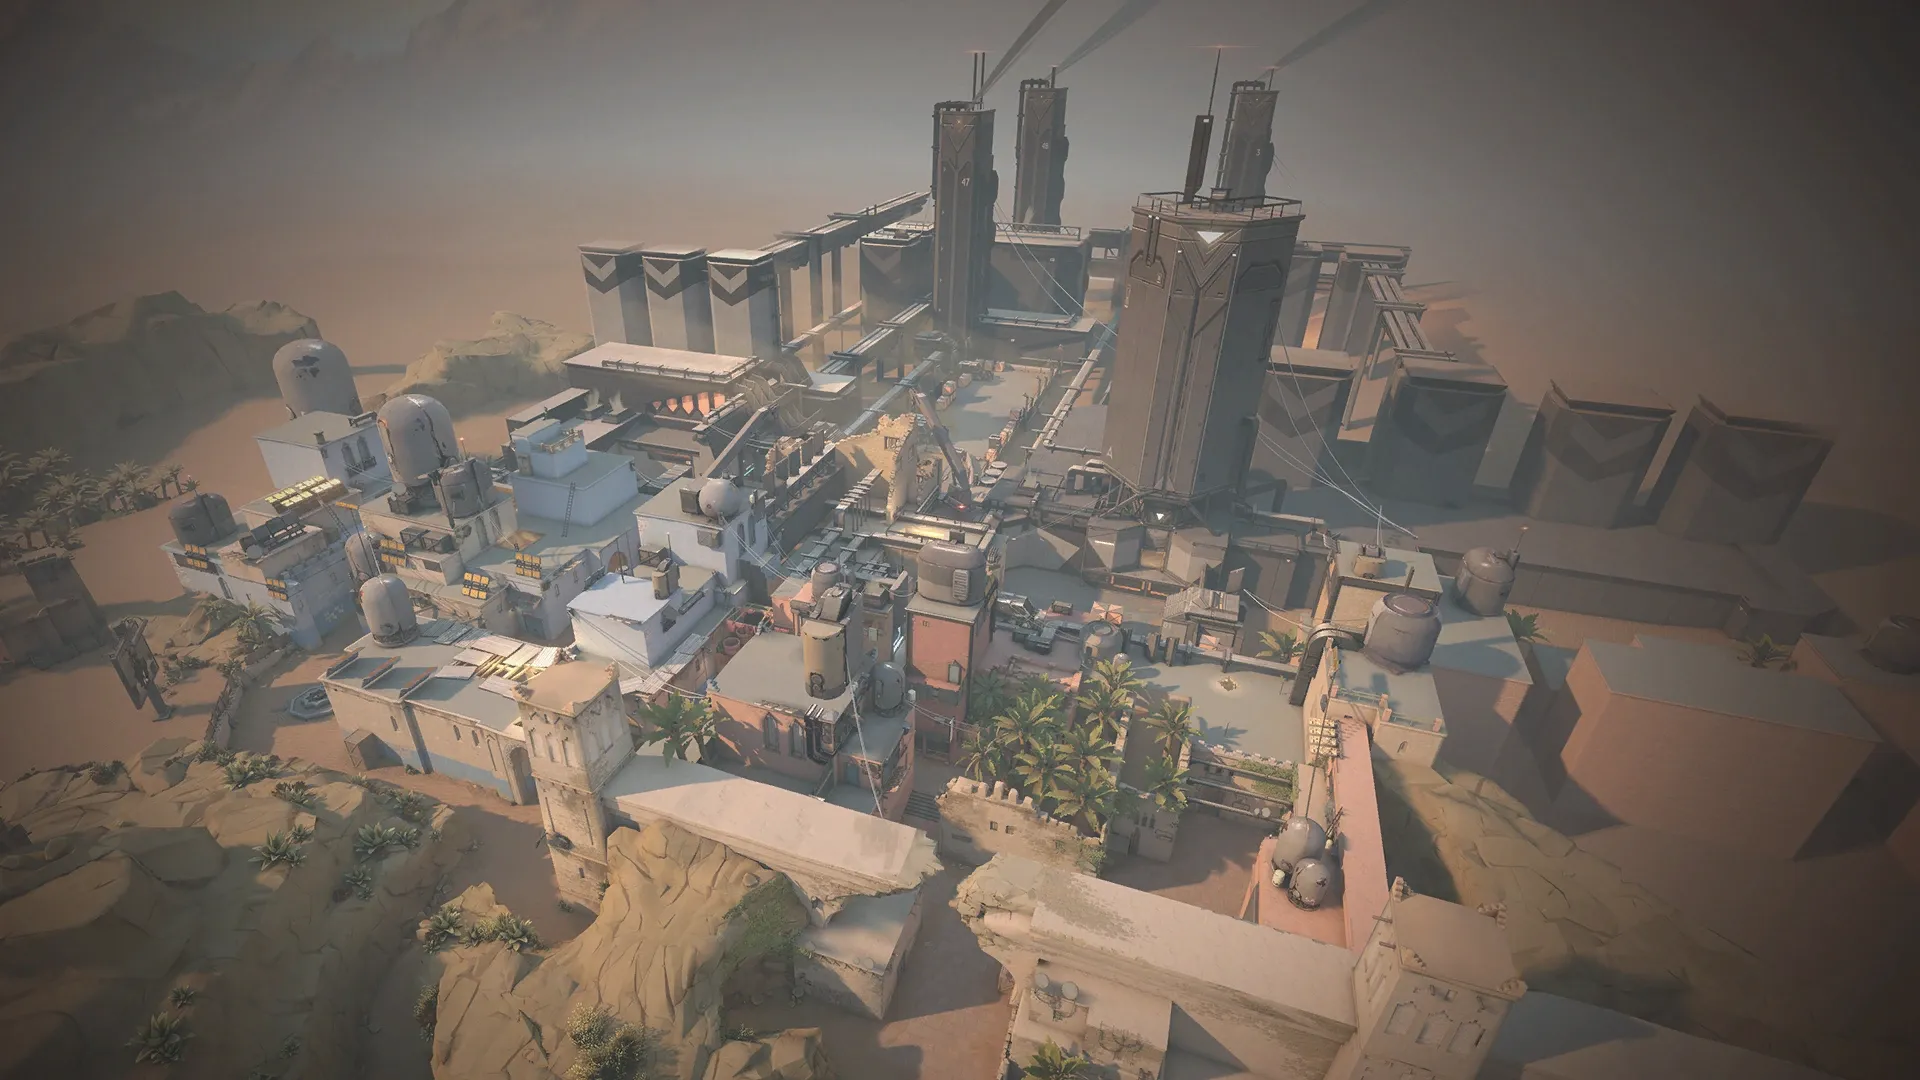
Bind map overview
Bind operates on a two-site structure with no connecting pathway between bombsites. Teams must commit fully to either A or B approaches, with attackers reaching A site via Showers (Bath) or A Short, and B site through Garden (B Long) or Hookah (B Window). These bottleneck entry points generate intense pressure scenarios that define Bind's tactical identity.
The Moroccan setting showcases Kingdom Corporation's industrial exploitation against historical architecture, reflecting the lore's radianite mining operations. Historic ruins contrast sharply with metal industrial structures, visually representing the ecological damage from Kingdom's activities. This aesthetic split mirrors the map's complete site separation.
Defensive advantages emerge from Bind's compressed pathways and abundant corner positions. Limited site entry options allow defenders to establish dominant angles with clear sightlines, contributing to the map's defensive-leaning statistics.
Bind unique features
Bind's revolutionary teleporter system fundamentally alters rotation dynamics through two one-way transporters. The first connects A Short to B Short, while the second links B Long to A Lobby. These mechanisms reshape how teams approach both rotations and site executions.
Teleporter usage involves walking through the entrance to instantly appear in an exit room with automatic door opening. Abilities, the spike, and dropped weapons travel through teleporters while maintaining velocity and potentially triggering exit doors.
Every teleporter activation generates a loud, map-wide audio cue audible to all players. This creates a fundamental tactical trade-off between rotation speed and information surrender. The psychological pressure affects defenders constantly, who must account for rapid enemy repositioning possibilities.
Bind strategic tips
Success on Bind requires precise coordination and timing awareness.
Default positioning proves essential: Rather than stacking sites, deploy two players on B Long, one outside Hookah, one A Short, and one in Showers. This prevents area-denial ability massacres while creating multiple pressure points.
Teleporter deception tactics: Audio cues enable fake rotations that draw defenders away before executing on weakened sites. However, predictable teleporter usage often results in interception by waiting defenders.
A site execution: Dual-lane pressure through A Short and Showers collapses defenders into uncomfortable positions.
Defensive approaches: Agents like Viper, Cypher, or Killjoy can solo-hold B site with proper utility setups, freeing teammates for other areas. Sound detection becomes critical without mid control, requiring surveillance tools at Showers and Hookah.
Advanced techniques: Cypher players can attach Spycams to teleporter doors and shoot tracking darts through them, creating fake rotation sounds without actual teleporter usage.
Information-gathering and area-denial specialists excel on Bind's rotation-heavy design. Agents with recon capabilities and space control prove particularly effective across this unique battleground.
Mastering Bind demands understanding its distinctive flow patterns where committed pushes, rapid rotations, and calculated deception determine competitive success.
Breeze
Breeze stands as one of the most expansive maps in Valorant's competitive rotation, representing a tropical paradise set within the mysterious Bermuda Triangle. This Caribbean-themed battlefield follows a classic three-lane design with vast open spaces, accommodating both aggressive snipers and tactical shooter enthusiasts who thrive on long-range engagements.
Breeze map overview
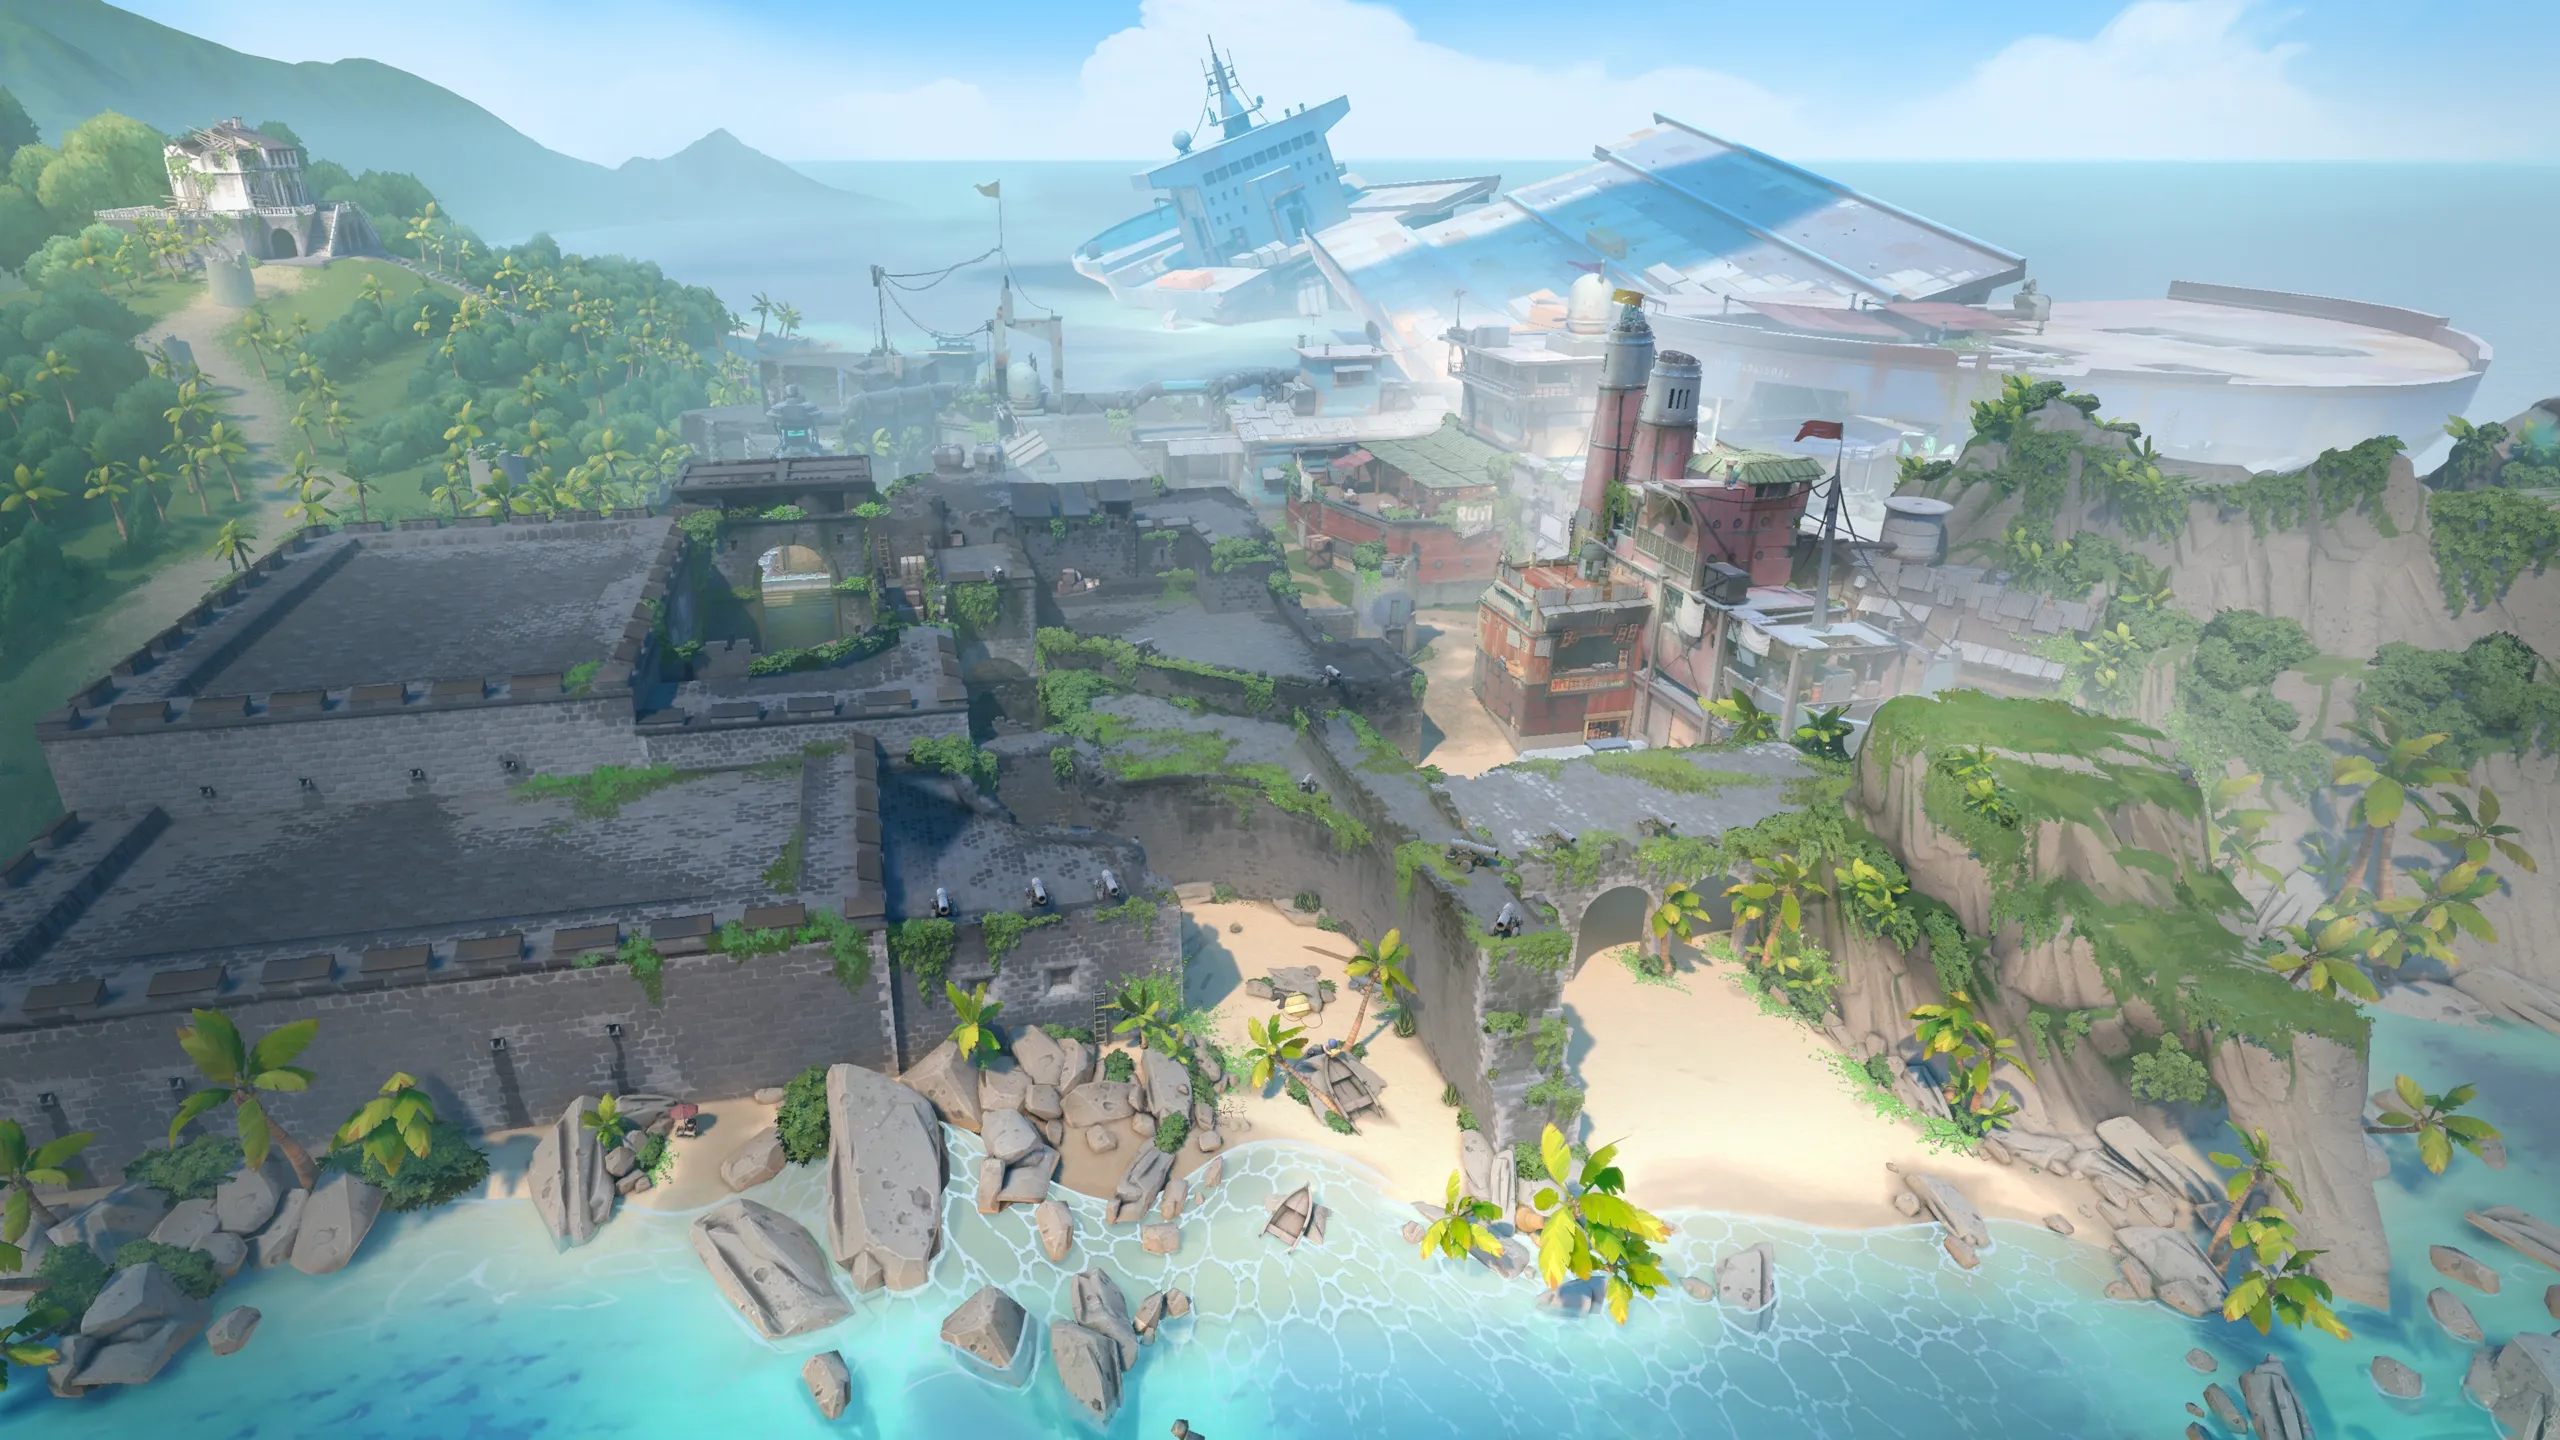
Breeze's expansive layout positions two spike sites at opposite ends, connected by an enormous central zone that serves as the map's strategic centerpiece. The open design functions as the primary battleground, facilitating rotations between sites while providing exceptional sightlines for long-range duels. According to Valorant lore, this remote island represents a mysterious location within the Atlantic Ocean's Bermuda Triangle, featuring a radianite mine and a beached Kingdom Corporation cargo ship.
Architecturally, Breeze captures authentic tropical elements through bright coral structures, historic ruins, and scattered maritime debris. A site centers around two distinctive metal pyramids surrounded by shallow water, while B site displays a large central pillar with minimal cover and wide exposure angles. This detailed environment maintains aesthetic appeal without sacrificing the competitive functionality that rewards precise aim and positioning.
Attackers particularly benefit from Breeze's design, which allows aggressive angle-holding and coordinated pushes through multiple entry points. Notably, Breeze maintains the highest Operator usage rate among all maps, as the wide open spaces and exceptionally long sightlines create perfect conditions for sniping duels. The map heavily favors teams with strong aim fundamentals and agents who can control vast areas with utility.
Breeze unique features
Breeze distinguishes itself through several mechanical features centered around A Hall. The map includes rope ascenders on both attacker and defender sides that provide silent access into A Hall, allowing for stealthy flanking opportunities. These ropes connect A Lobby for attackers and A Bridge for defenders, creating dynamic rotation paths that skilled players can exploit.
The mechanical door at A Hall represents another unique tactical element. This indestructible door starts closed each round and can be opened or closed using switches on either side, one near A Site and one inside Hall. Unlike destructible doors on other maps, this door cannot be destroyed and requires deliberate activation, creating strategic timing decisions for both attackers looking to push Hall and defenders attempting to hold the area.
Additionally, Breeze includes a one-way chute located on the attacker side of A Hall that descends into Mid Bottom. This vent allows players to drop from Hall to Mid quickly, enabling rapid rotations and surprise flanks. The chute features an automatic horizontal door at the bottom that prevents upward travel, blocking agents from using mobility abilities to reverse course. When used, the chute creates a distinct audio cue that alerts nearby players, making timing and coordination essential for successful plays.
Breeze strategic tips
Mid-control dominance: Controlling the central area provides overwhelming advantages on Breeze. Attackers gain access to both sites through multiple angles and can cut off defender rotations effectively. The Mid Nest position offers visibility across both sites and helps control enemy movements. Securing Mid Wood Doors and Mid Pillar early allows teams to dictate the pace of rounds.
Utilize the mechanical features strategically:
- For attackers: Coordinate the mechanical door opening with team pushes through A Main to create pincer attacks, or use the Hall chute for surprise mid-round rotations from A to B
- For defenders: Use the rope ascenders to quickly rotate through Hall between sites, and listen for the audio cues from the chute and door to anticipate attacker movements
A site execution: Effective A site attacks involve controlling A Cave early while simultaneously applying pressure through Mid Wood Doors. Controllers should smoke A Pyramids and Bridge to block long sightlines from defenders. The A Hall route provides an alternative entry point that can catch defenders off guard when coordinated with the main push. Clearing the numerous angles around the pyramids requires systematic utility usage and crossfire setups.
B site approach: B site demands methodical clearing due to limited cover and exposure to multiple angles. Standard strategy involves first securing B Elbow or Mid control, then pushing through B Main with smokes blocking B Window and defensive positions. The narrow B Tunnel provides an alternative flanking route from Mid. The site's openness makes post-plant positions challenging, requiring teams to use utility for coverage and control retake angles.
Operator priority: Breeze rewards teams that prioritize Operator purchases due to the map's exceptional sightlines. Multiple Operators can be viable on this map, with common positions including Bridge holding A Main, Mid Nest watching both sites, and B Window covering B Main. Protecting Operator players with smokes and flashes becomes critical, as losing an Op early significantly weakens map control.
Agent selection: Controllers are essential on Breeze, with Viper remaining dominant due to her wall covering massive distances across the map. Harbor and Omen provide viable alternatives with their long-range smoke capabilities. Jett excels as a duelist through her Operator proficiency and dash mechanics for aggressive peeks. Chamber provides Sentinel value while doubling as an Operator threat. Initiators like Sova and Skye gather crucial information across the map's vast spaces, with Sova's Recon Bolt clearing multiple angles simultaneously. KAY/O's suppression abilities prove valuable for site executions.
Defenders facing aggressive pushes must leverage the map's long sightlines and elevated positions effectively. Coordinating crossfires and utility usage becomes paramount, as the lack of cover makes raw aim duels more frequent than on other maps. Teams should always designate a flank watcher, as Breeze's size enables easy rotations around the map's perimeter. Mastering smoke placements to block key sightlines separates successful teams from those who struggle on this expansive tropical battlefield.
Corrode
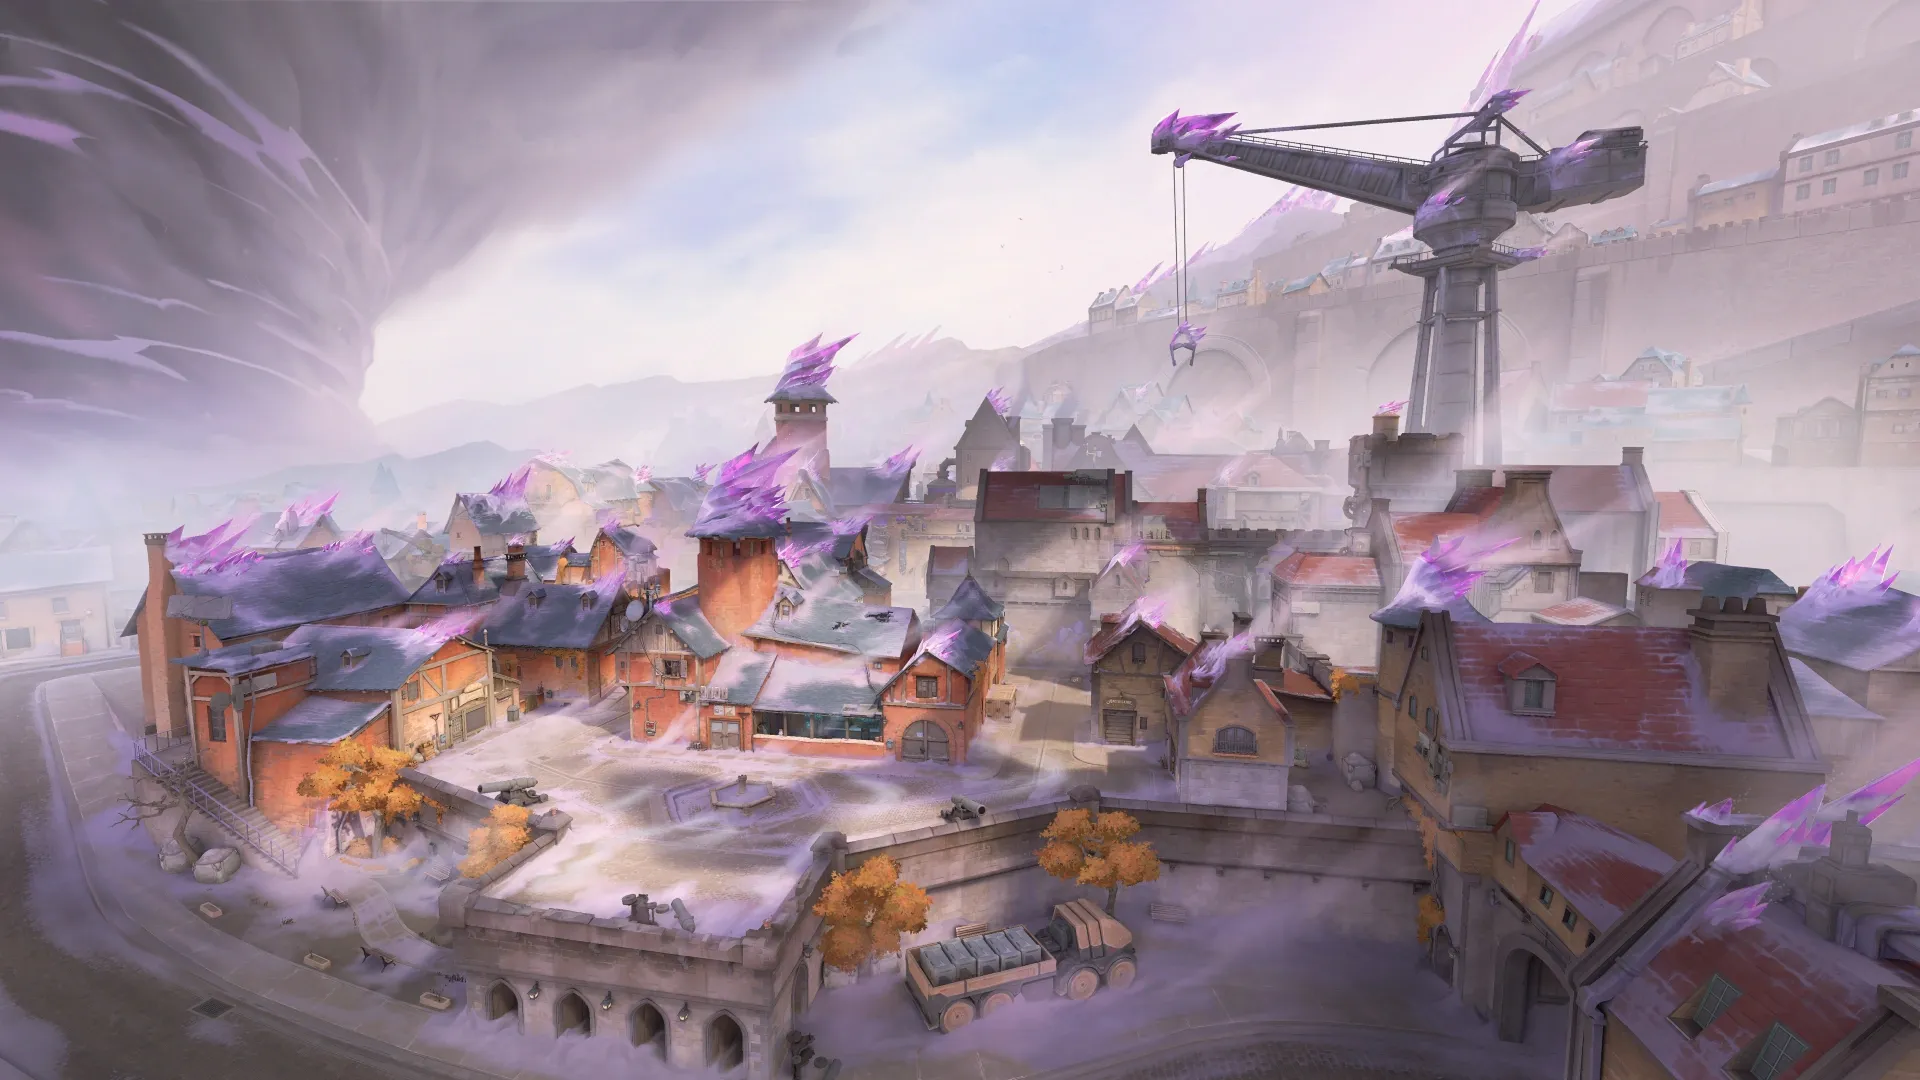
Corrode joined the Valorant map rotation in June 2025 as the twelfth map overall, marking Riot's deliberate shift back toward traditional tactical shooter principles. Patch 11.00 introduced this newest battleground directly into both casual and competitive queues upon release.
Corrode map overview
Omega Earth's version of Mont-Saint-Michel serves as the setting for Corrode, where a historic French castle town has been converted into a radianite salt mining operation. First Light's climate impact drained the surrounding waters, exposing valuable salt flats that residents now harvest for resources. The map employs a standard three-lane, two-site layout without dynamic elements or mechanical gimmicks, making it only the second map in the current rotation to follow this straightforward design approach.
Corrode unique features
Corrode deliberately avoids the complex mechanics found on other maps, instead focusing on core tactical gameplay. The design specifically counters utility-heavy strategies, providing defenders with layered positions to survive coordinated ability usage. Multiple wallbangable surfaces throughout the map make weapons like the Odin particularly potent for securing eliminations through cover.
Corrode strategic tips
Mid area dominance determines success on Corrode. This central zone connects both spike sites and enables quick rotational support while creating opportunities to catch enemies moving between positions. Attackers gain significant advantages through mid control, allowing flexible site execution, while defenders can use it for aggressive flanks or faster rotations.
Agent selection should prioritize:
- Controller duo of Omen and Viper for superior map control through smoke coverage and poison barriers
- Fade for information gathering using Prowlers to clear tight spaces and Haunt to reveal enemy locations
- Double Sentinel setups excel on Corrode, effectively locking down both open areas and bomb sites simultaneously
Map Comparison Overview
The seven maps currently active in competitive rotation demonstrate distinct tactical characteristics that directly impact team strategies and agent selection. Understanding these fundamental differences proves essential for competitive success across different battlegrounds.
This data reveals clear patterns across the competitive map pool. Five maps utilize traditional three-lane layouts, while Bind stands alone with its two-site, no-mid design. Haven and Lotus both feature three bomb sites, creating unique resource allocation challenges. The mechanical features range from simple wallbangable surfaces on Corrode to complex rotating doors on Lotus, each requiring specific tactical adjustments.
Haven

Haven stands apart in the competitive map pool as the only battleground featuring three bomb sites, positioned beneath a forgotten monastery in Bhutan. This unconventional design creates tactical scenarios that stretch traditional strategic approaches to their limits.
Haven map overview
The three distinct spike sites (A, B, and C) force defenders to spread their resources across considerably more territory than any other map in the rotation. This expansive layout enables defenders to take aggressive map control through forward positioning, creating dynamic engagement opportunities. Multiple interconnected pathways connect all sites through a central mid-area that serves as the strategic nexus for rotations.
The monastery's Eastern architecture features narrow corridors and elevation changes that define each site's character. A site includes an elevated tower position that dominates sightlines, B site occupies a compact central area perfect for close-range duels, and C site extends into a long corridor that heavily favors precision rifles. These characteristics contribute to Haven's reputation as an attacker-sided map, with offensive teams typically maintaining above 50% win rates.
Haven's size demands exceptional team coordination and communication. Defenders must execute precise callouts and efficient rotations across the extensive pathway network to maintain site control.
Haven unique features
Haven remains the only map in the competitive pool with three bomb sites a fundamental departure from the standard two-site format found on every other battleground. This design philosophy completely alters offensive and defensive resource allocation, requiring deeper strategic planning and tactical flexibility.
The map features destructible door panels at Mid that initially absorb damage and block bullet penetration. Each panel contains 400 HP with color-coded damage indicators progressing from blue to yellow to red. Once destroyed, these panels become wallbangable for the entire round, opening new tactical possibilities.
Elevation advantages play a crucial role throughout Haven's design. A Tower (Heaven) provides defenders with commanding sightlines over the A site area, while C Long creates the map's only extended engagement distance, making it prime real estate for Operator users.
Haven strategic tips
Mid control determines Haven's flow more than any other area. For attacking teams:
- Central area dominance: Securing Garage and Mid Courtyard unlocks split executions across all three sites. Smoke Mid Window while using recon abilities to clear defensive positions.
- Site-specific strategies: A site proves easiest to defend but remains vulnerable to coordinated utility dumps. Avoid A Long approaches due to Tower exposure. Execute C site through C Short with grouped pushes.
- Rotation manipulation: The classic fake A-to-C strategy consistently catches defenders off-guard apply initial pressure at A before committing resources to C during defensive rotation timing.
Defensive approaches require careful resource management:
- Personnel distribution: Standard setups position one player per site with two players available for flexible rotations. Sentinel agents like Cypher or Killjoy excel at solo site holds.
- Early intelligence: Sova drones and BoomBots provide critical information about attacker intentions, enabling proactive defensive adjustments.
- Retake mentality: Haven's attacker advantage often makes retaking sites more viable than stubbornly holding positions, particularly at B site where rotational support arrives quickly.
Haven's strategic complexity makes it one of the most demanding maps in the competitive rotation. The three-site configuration creates endless opportunities for tactical innovation while punishing teams that lack coordination and game sense.
Pearl
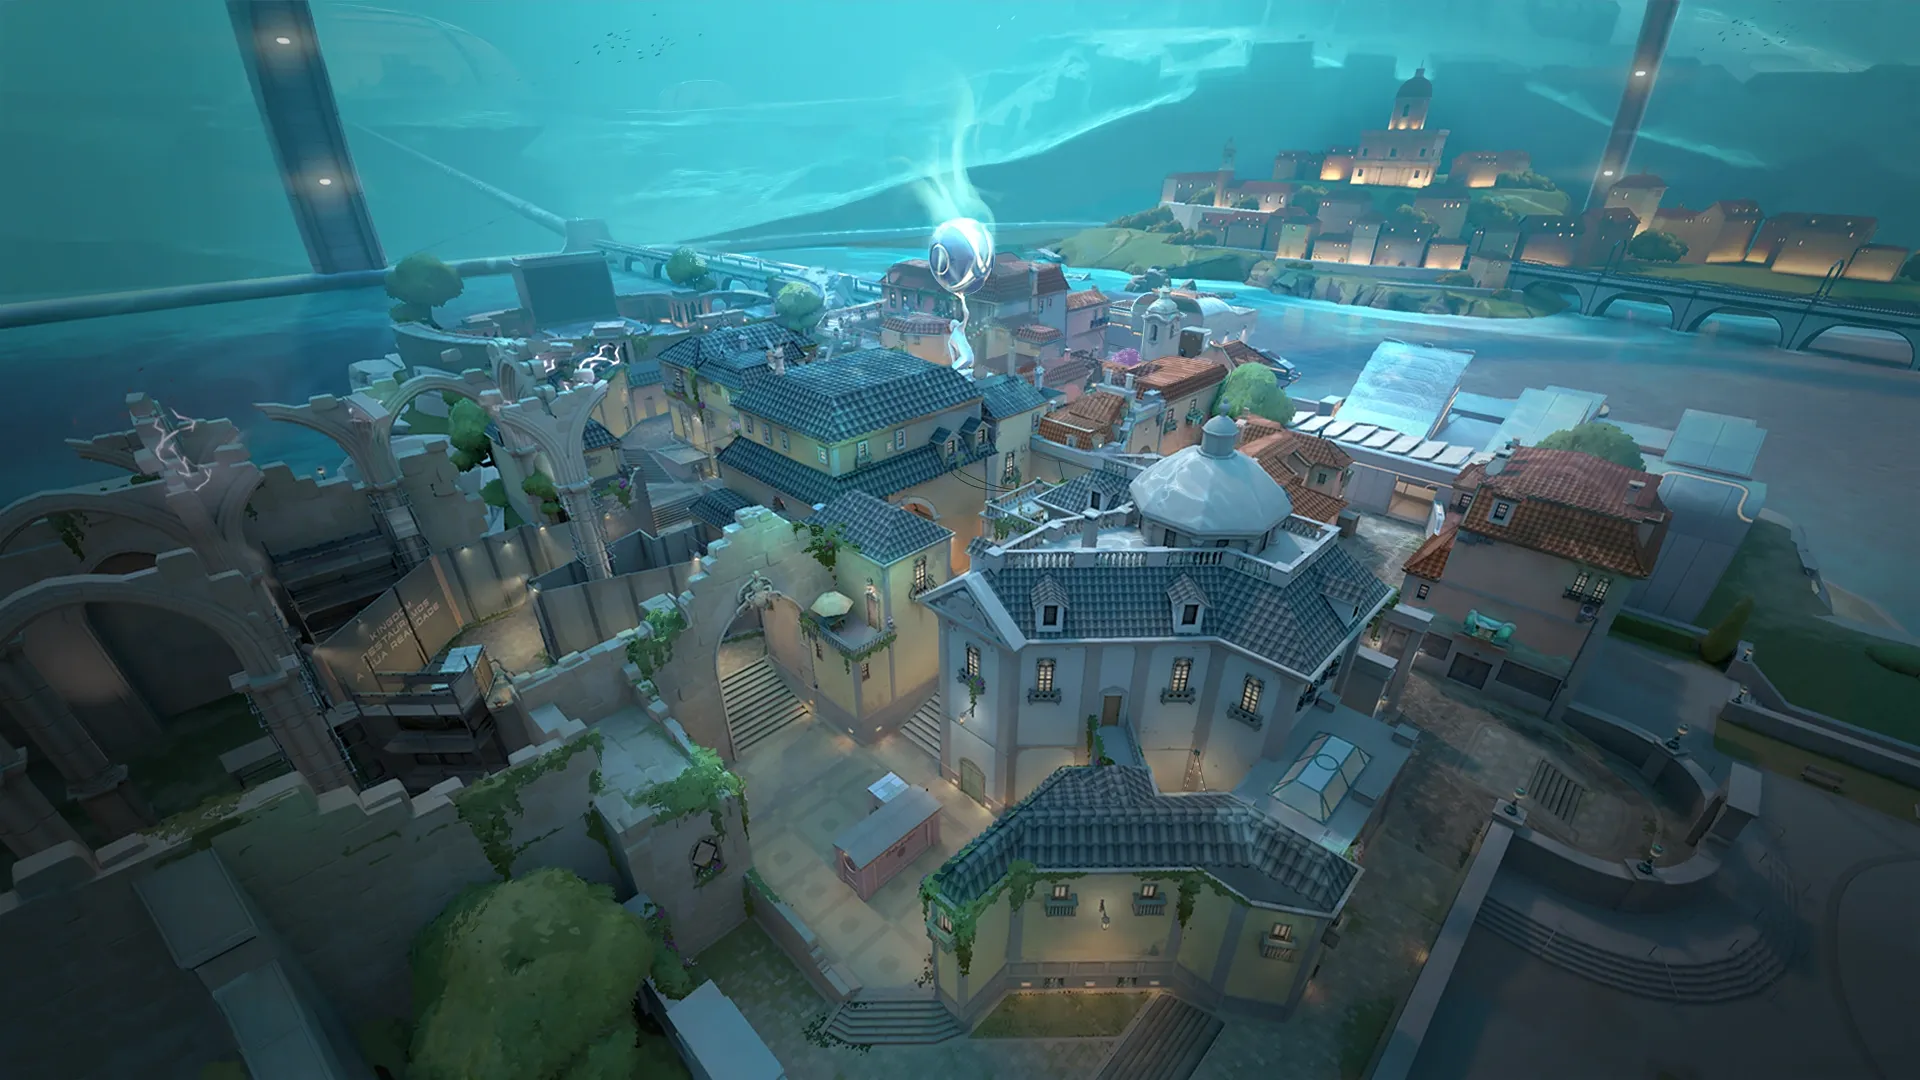
Pearl stands as one of the most tactically pure map in Valorant, representing an underwater metropolis beneath Lisbon, Portugal. This geo-dome protected city follows a traditional three-lane design that returns to fundamentals, accommodating both newcomers seeking straightforward gameplay and veteran tactical shooter players who value strategic depth without mechanical gimmicks.
Pearl map overview
Pearl's symmetrical layout positions two spike sites at opposite ends, connected by an expansive central zone that serves as the map's strategic hub. The mid area functions as the primary battleground, facilitating rotations between sites while providing crucial information to both teams. According to Valorant lore, this underwater city represents Omega Earth's Lisbon preserved beneath the Atlantic Ocean, protected by geodesic domes constructed through collaboration between the VALORANT Legion and Kingdom Industries.
Architecturally, Pearl captures authentic Portuguese elements through colorful tile work, historic architecture, and a prominent central monument featuring the Kingdom statue with a globe. A site features multiple entry points through Restaurant, Secret, and Art, while B site displays the Museu do Multiverso museum with long sightlines down B Main. This detailed environment maintains aesthetic appeal without sacrificing competitive functionality through its clean, traditional layout.
The map particularly emphasizes straightforward tactical execution without mechanical elements. Pearl is the first map released after launch to exclude teleporters, ropes, ascenders, or destructible doors. This design philosophy creates committed engagements where positioning, utility usage, and team coordination determine round outcomes rather than mechanical tricks. The map heavily favors teams with strong fundamentals and effective mid-round adaptations.
Pearl unique features
Pearl distinguishes itself through its complete absence of dynamic mechanical elements, making it unique among modern Valorant maps. The map contains no teleporters, ropes, ascenders, or destructible doors that have become standard features on other battlegrounds. This minimalist design philosophy forces players to rely entirely on agent abilities, precise positioning, and tactical coordination rather than map-specific mechanics.
The holes and windows cut into walls throughout Pearl create its defining tactical feature. These openings allow high-mobility agents like Jett and Raze to access unexpected angles and positions through dash or satchel movement. The windows between areas like Flowers and Secret provide opportunities for devastating flanks or defensive plays when timed correctly. These architectural elements reward creative utility usage and agent-specific movement without introducing mechanical complexity.
Additionally, Pearl features a moderate ceiling height that enhances the impact of vertical utility plays. The open skybox across most of the map allows controllers to smoke from anywhere while enabling global ultimate abilities to function without restriction. The map's interconnected corridors in mid create multiple small pathways rather than one large central zone, demanding precise timing and teamwork to control effectively. This design makes smokes and area denial abilities particularly valuable for gaining and maintaining map control.
Pearl strategic tips
Mid-control dominance: Controlling the central area provides overwhelming advantages on Pearl. The mid zone consists of multiple interconnected corridors including Mid Plaza, Mid Connector, Mid Shops, and Mid Doors. Teams that secure early mid control gain flexible rotation options to both sites and can cut off enemy rotations effectively. The Kingdom statue provides central cover while Mid Top offers visibility toward both bomb sites.
Utilize the traditional layout strategically:
- For attackers: Focus on gaining mid control early through utility investment, then use this central position to execute split attacks on either site or fake one site to draw rotations before hitting the other
- For defenders: Invest in holding mid positions early to gather information and delay attacker advances, but avoid over-committing as the multiple pathways make trades unfavorable without backup
A site execution: Effective A site attacks involve controlling A Main through Restaurant while applying pressure via Art or Secret. The site is notably attacker-favored due to multiple entry points that create crossfire opportunities. Controllers should smoke A Site and Dugout to block defensive positions. However, defenders have excellent retake potential through three different paths including A Link, making post-plant positioning crucial. Attackers should plant for A Main control and establish defensive positions in Restaurant to deny retakes.
B site approach: B site heavily favors defenders due to long sightlines down B Main and elevated positions like B Tower. The site was redesigned in Patch 6.11 to address balance issues, with changes to B Ramp including a shortened screen and jump-up replacing the previous ramp. Standard strategy involves smoking B Hall and B Tower, then executing a fast push through B Main. The open layout makes Operator usage particularly effective for defenders. Post-plant scenarios require holding B Link and B Main to prevent retakes from multiple angles.
Ultimate orb priority: Pearl features two ultimate orbs positioned in Mid Plaza and Mid Connector. Securing these orbs early provides significant ultimate charge advantages, making the first orb contest a crucial element of opening rounds. Teams should coordinate utility to safely collect orbs while denying enemy access, as ultimate abilities often determine round outcomes on this map.
Agent selection: Pearl rewards agents who excel in traditional tactical gameplay. Controllers are essential, with Omen and Astra providing flexible smoke coverage across the map's multiple corridors. Harbor offers viable alternatives through his cascade and cove abilities. Jett dominates as a duelist through her Updraft ability for accessing elevated positions and her mobility for exploiting wall holes. Initiators like Fade and Skye gather crucial information across tight corridors, while their utility breaks defensive setups during site executions. Killjoy and Cypher excel as sentinels through effective lockdown of narrow pathways and rotation routes.
Defenders facing aggressive pushes must leverage the map's natural chokepoints and coordinate crossfire setups effectively. Pearl's lack of mechanical elements means teams cannot rely on gimmicks or shortcuts, requiring sound decision-making and precise utility usage throughout every round. The map rewards patient teams who gather information through mid control before committing to executions. Success on Pearl demands mastering fundamental tactical shooter principles including crosshair placement, utility timing, and team communication rather than map-specific tricks.
Split
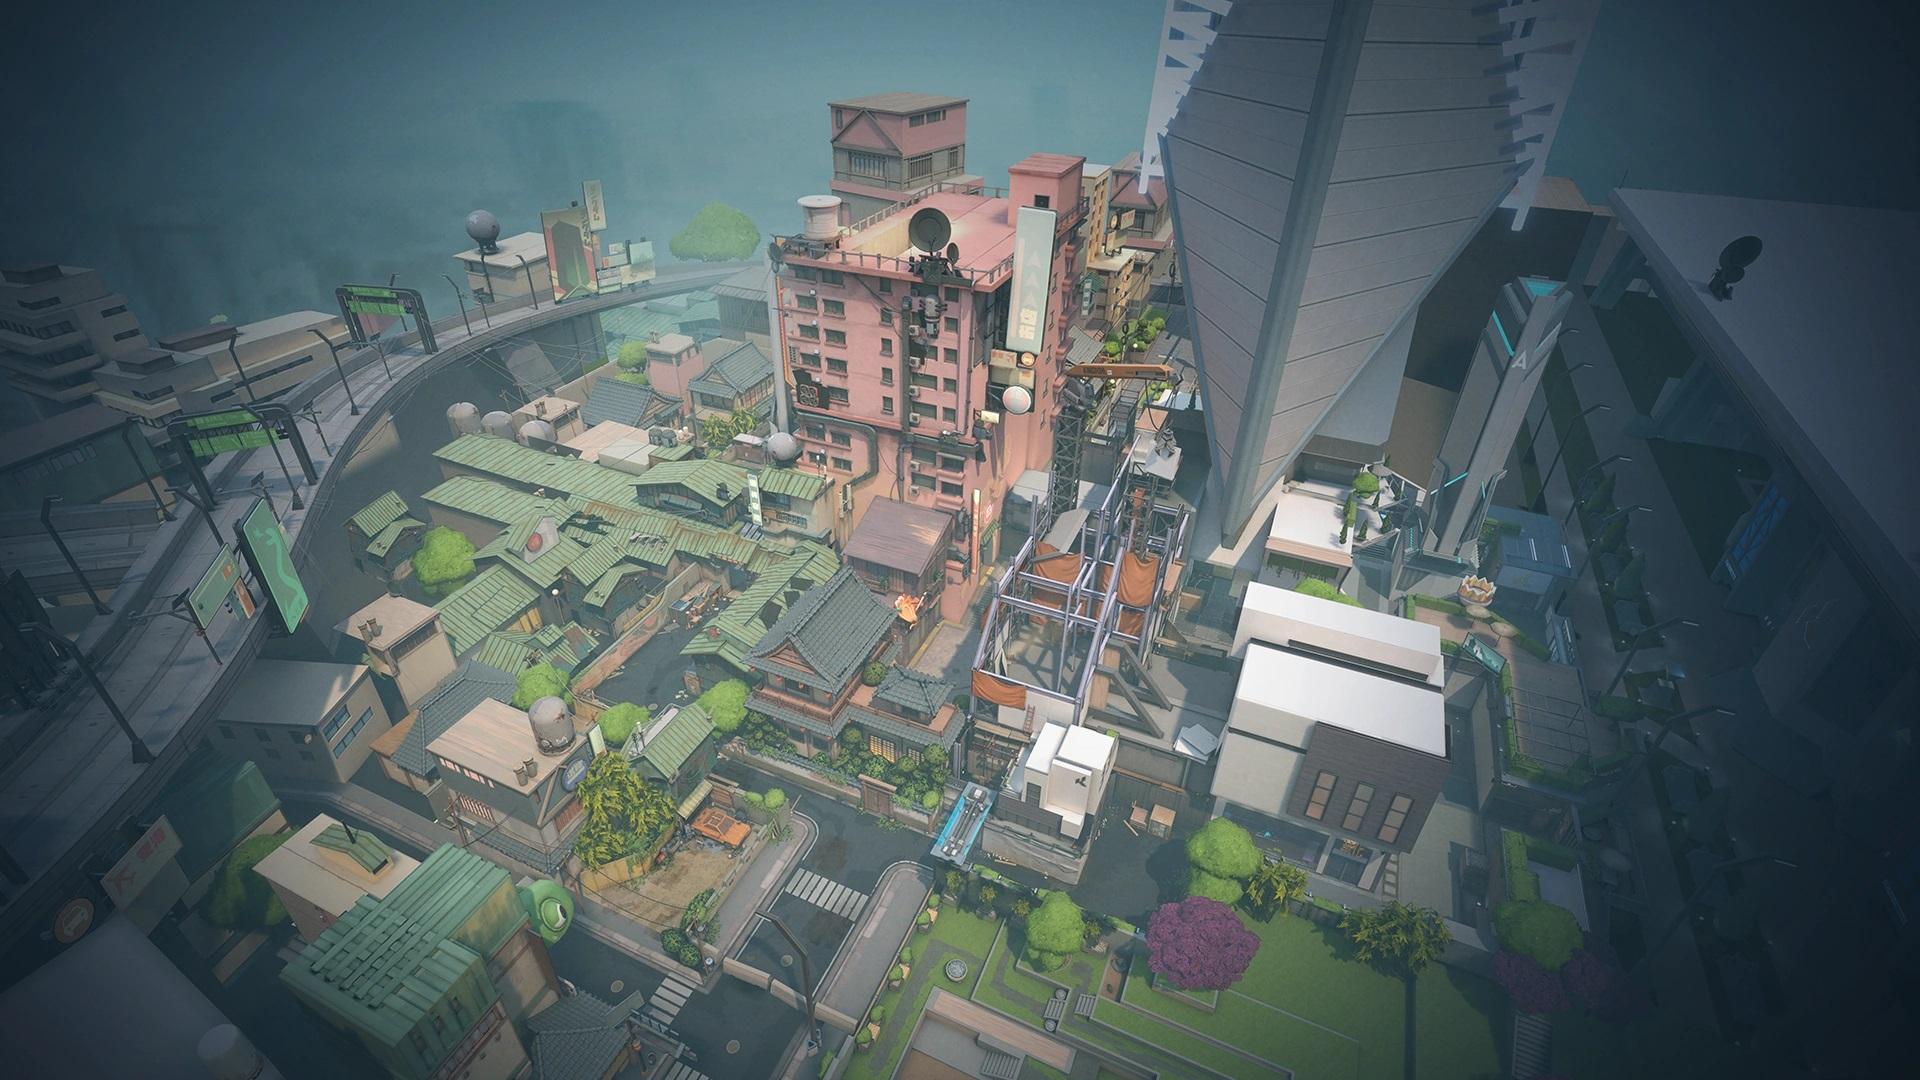
Split stands as one of the most vertically complex map, representing the Shinjuku district of Tokyo, Japan where cultural heritage clashes with corporate expansion. This three-lane battlefield follows a traditional tactical design enhanced by vertical gameplay mechanics, accommodating both newcomers seeking straightforward lanes and veteran tactical shooter players who thrive on elevation control and tight angle play.
Split map overview
Split's elevated layout positions two spike sites at opposite ends, connected by a contested central zone that serves as the map's strategic fulcrum. The mid area functions as the critical battleground, facilitating rotations between sites while providing vertical access points through rope ascenders. According to Valorant lore, this Tokyo district represents the cultural divide between traditional Japanese neighborhoods and Kingdom Corporation's aggressive modernization efforts, with locals fighting to preserve their heritage against corporate development.
Architecturally, Split captures the contrast between traditional Japanese elements and modern corporate structures through narrow streets, traditional shops, and the looming Kingdom headquarters tower visible from nearly every position. A site features a train station with announcements about Kingdom facilities, while B site displays a shopping district being gradually consumed by corporate redevelopment. This detailed environment maintains aesthetic storytelling while creating the tight corridors and elevated positions that define the map's competitive identity.
Defenders particularly benefit from Split's design, which allows strong angle-holding from elevated positions and rapid rotations through the compact layout. Notably, Split maintains the highest defensive win rate among competitive maps, as narrow chokepoints and commanding tower positions create natural advantages for teams holding sites. The map heavily favors coordinated defenders who leverage verticality and communication to control space effectively.
Split unique features
Split distinguishes itself as Valorant's first map to feature rope ascenders, introducing vertical mobility mechanics that fundamentally alter gameplay dynamics. The map contains three sets of ascenders positioned strategically throughout the environment. Two sets connect Sewer to A Lobby, allowing both attackers and defenders quick access to elevated positions around A site. The third set links B Hell to B Tower, providing rapid vertical movement for controlling the B site area.
These rope ascenders create silent movement opportunities unlike standard stairs or ramps, enabling surprise rotations and unexpected angle-takes when used strategically. The ascenders work both directions, meaning players can quickly drop from elevated positions or ascend to contest high ground. However, players remain vulnerable during the animation, making timing and awareness crucial when using these tools under pressure. The ascenders fundamentally change how teams approach map control and rotations.
Additionally, Split emphasizes verticality through its dual tower design. Both A Tower and B Tower provide commanding elevated positions that overlook their respective sites and control key sightlines. A Tower connects to Mid Vent and offers visibility over A Main, A Screens, and the planting area. B Tower grants control over B Main, Mid Mail, and the site itself. These elevated positions create the signature defensive advantage, as holding high ground forces attackers to clear multiple vertical levels while pushing sites. The tight corridors throughout the map compound this effect by limiting attacker options for avoiding these elevated angles.
Split strategic tips
Mid-control dominance: Controlling the central area provides overwhelming advantages on Split. The mid zone consists of Mid Top, Mid Bottom, Mid Vent, and Mid Mail, creating multiple pathways between sites. Teams that secure early mid control gain access to both A Tower through Vent and B Tower through Mail, enabling devastating split pushes. Mid control allows rapid rotations while denying opponents the same flexibility. The narrow corridors make utility investment essential for securing these spaces.
Utilize the rope ascenders strategically:
- For attackers: Use the Sewer ascenders to quickly access A Lobby and apply pressure from unexpected angles, or coordinate ascender timing with main pushes to create crossfire situations that overwhelm defenders
- For defenders: Monitor ascender audio cues to predict enemy movements, and use them for rapid rotations between sites while avoiding predictable paths that attackers might prefire
A site execution: Effective A site attacks involve smoking A Screens and A Rafters to block defensive crossfires, then pushing through A Ramps to secure A Tower control. The elevated position grants site control and vision over A Main. Alternatively, teams can execute fast pushes through A Main with coordinated flashes while simultaneously applying pressure through Sewer to A Lobby. The narrow A Main chokepoint requires systematic utility usage to break defensive setups. Post-plant positions favor playing from A Tower and Rafters to deny retakes from multiple defender entry points.
B site approach: B site demands controlling B Tower before executing onto the site itself. Standard strategy involves smoking or walling B Tower to block the dominant elevated position, then pushing through B Main with flashes clearing common angles. The B Garage route provides an alternative entry that can catch defenders off guard when coordinated with main pressure. B site's compact layout makes post-plant positioning challenging, requiring teams to secure B Rafters and B Back while watching for retakes from B Link and Mid Mail. The lack of substantial cover on site makes utility crucial for post-plant success.
Elevation control priority: Split rewards teams that prioritize controlling elevated positions throughout rounds. Defenders should establish early presence in A Tower, B Tower, and A Rafters to maximize their natural advantage. Attackers must systematically clear or smoke these positions before site executions. The rope ascenders create opportunities for both teams to contest high ground, making coordination essential. Teams that lose elevation control find themselves at severe disadvantages due to exposed positions and limited angles.
Agent selection: Split rewards agents who excel in vertical combat and tight corridor control. Raze dominates through her Paint Shells clearing elevated positions and Blast Packs providing alternative access to high ground. Omen remains essential through his smokes blocking tower sightlines and teleports enabling creative positioning. Cypher excels at information gathering through Trapwires covering narrow passages and Spycam monitoring multiple angles. Skye provides crucial site-taking potential through her flashes and healing supporting sustained pushes. Sage offers exceptional defensive value through Barrier Orbs blocking narrow chokepoints and Slow Orbs denying aggressive pushes.
Attackers facing Split's defensive advantages must invest heavily in mid control and systematic site clearing. The map's compact size enables fast rotations, making fakes and misdirection valuable tactical tools. Teams should always maintain awareness of elevation advantages and avoid committing to fights where defenders hold superior positioning. Success on Split demands understanding that rounds pivot on mid control battles, vertical positioning, and coordinated utility usage rather than individual aim duels. Mastering the rope ascender timing and tower control separates successful teams from those who struggle against the map's inherent defensive bias.
Current Map Pool Analysis
Mastering Valorant's seven-map competitive rotation separates skilled players from the competition. Each battlefield presents distinct tactical challenges that demand different approaches and agent selections.
The current seven-map pool represents Riot's most balanced rotation to date, featuring diverse tactical challenges while maintaining competitive integrity. The inclusion of Corrode introduces fresh strategic elements, while the reworked Breeze addresses long-standing community concerns about oppressive long-range dominance. Teams that master fundamental skills (aim, utility coordination, map control) while adapting to each map's unique characteristics will find success across this diverse rotation.
The pool's emphasis on mid-control, balanced engagement ranges, and reduced utility spam aligns with Riot's vision for competitive Valorant that prioritizes gunplay and strategic depth. As the meta continues evolving and teams develop new strategies on Corrode while adapting to the refreshed Breeze, this map pool promises dynamic competitive gameplay throughout Season V26.